

In an effort to reorganize my sewing room, I have been going through a lot of boxes and bags, some full of old projects. This was one off those. I got as far as constructing most of the lining, and began work on a bright pink textured wool blend for the exterior. Unfortunately, I never really loved the fabric, and so the project was set aside.

So I decided to ditch the pink, and finally found a use for this periwinkle wool coating that I have been trying to match to a project for years.
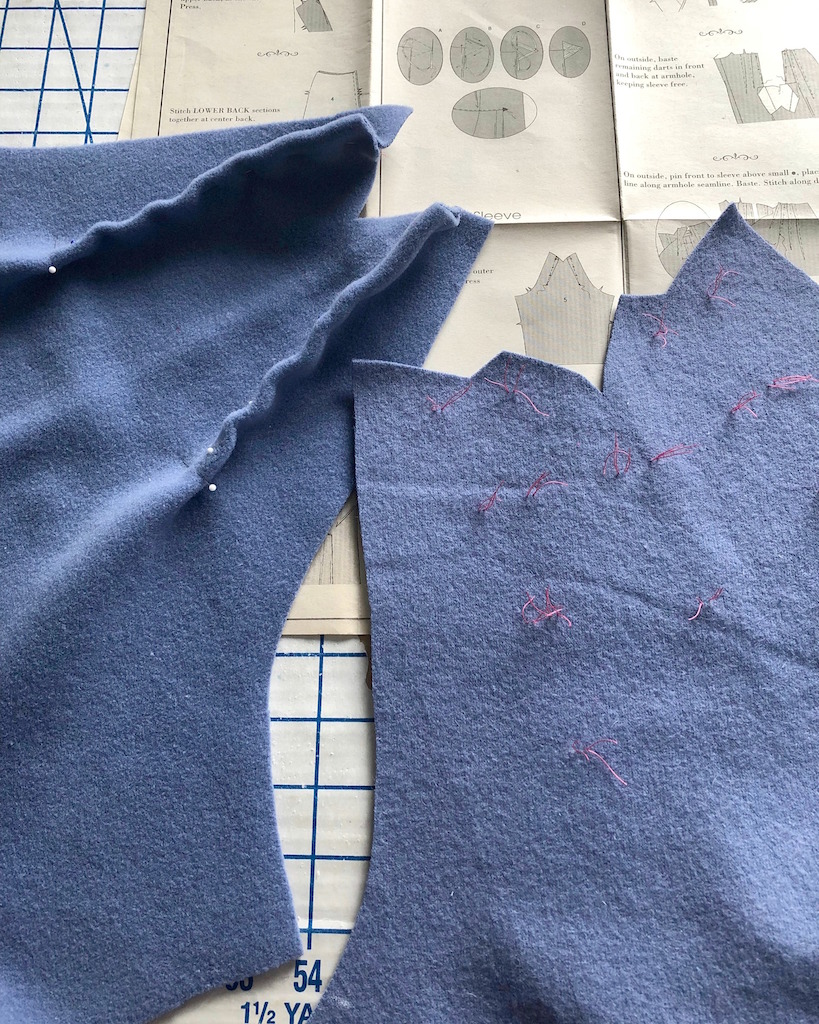
One of the challenges with this particular fabric is that it doesn't like to take marks from pencils, chalk, fabric pens, etc. And with all of those exposed darts, there was a lot of thread tracing to do!
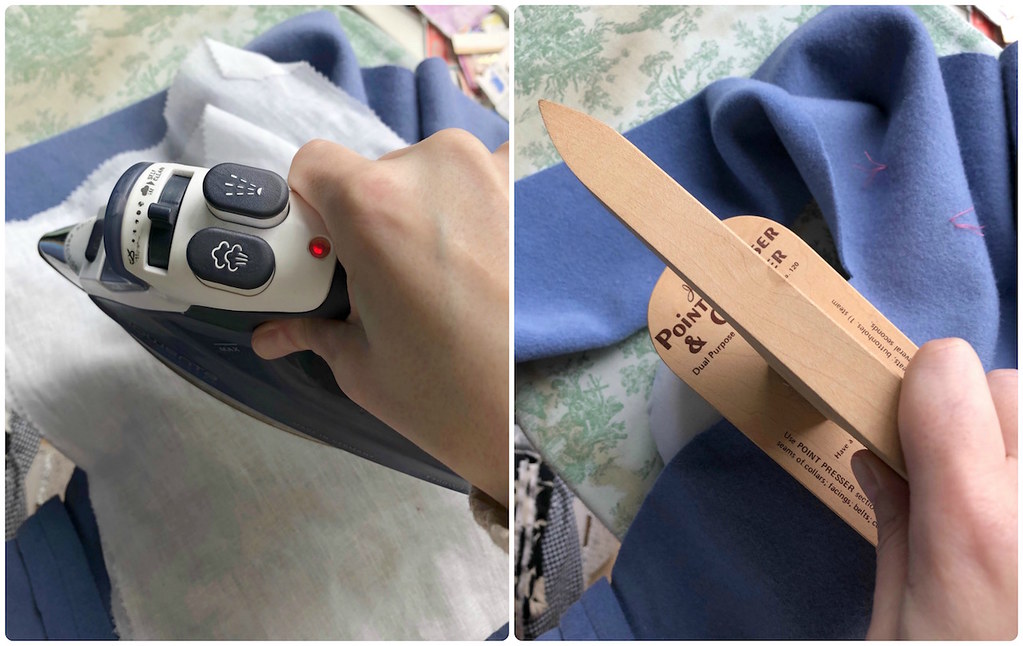
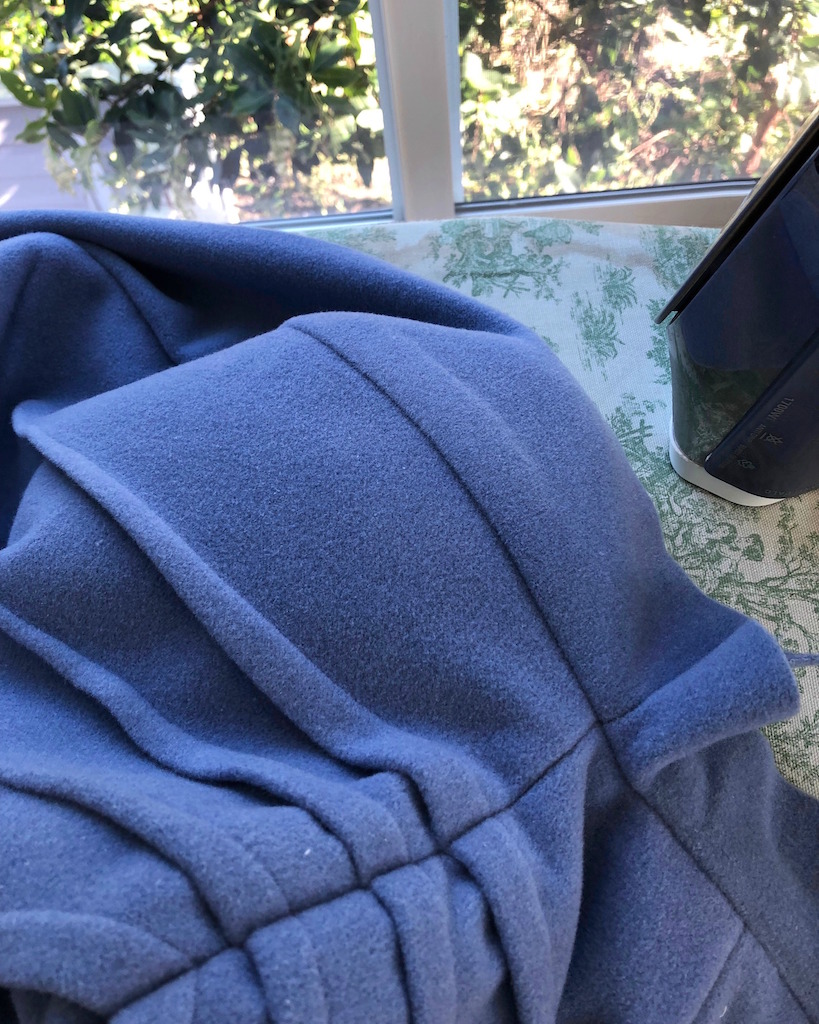
One other challenge I faced was pressing the fabric. As you can see in the following photo, this particular coating wrinkles, but a good press with a clapper was smashing the loft of the fabric.
The solution was to use a press cloth. This was not something that I expected from this fabric, but I was lucky that I experimented with a scrap before messing up a portion of my coat.
I also added a cotton facing to the upper portion of the front and back bodice pieces. The fabric has a lot of give, and I thought this would be a good solution to keep everything from stretching widthwise. (The cotton does not have any extra slack when on a dress form or a body!)

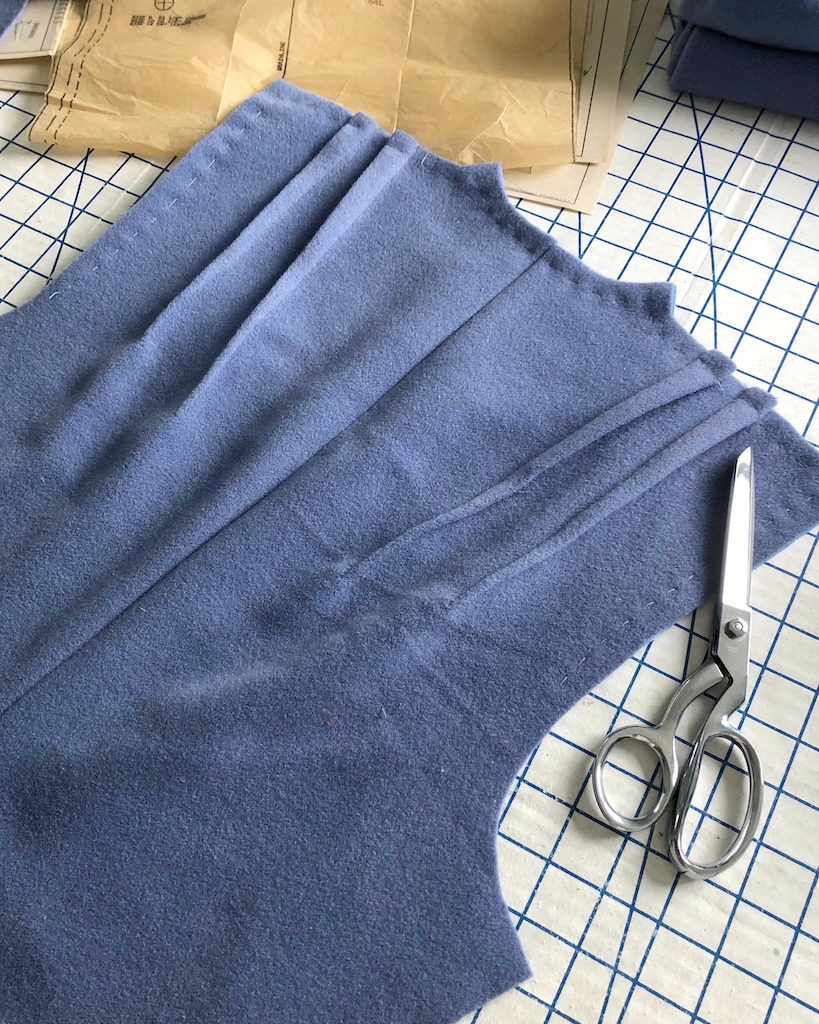
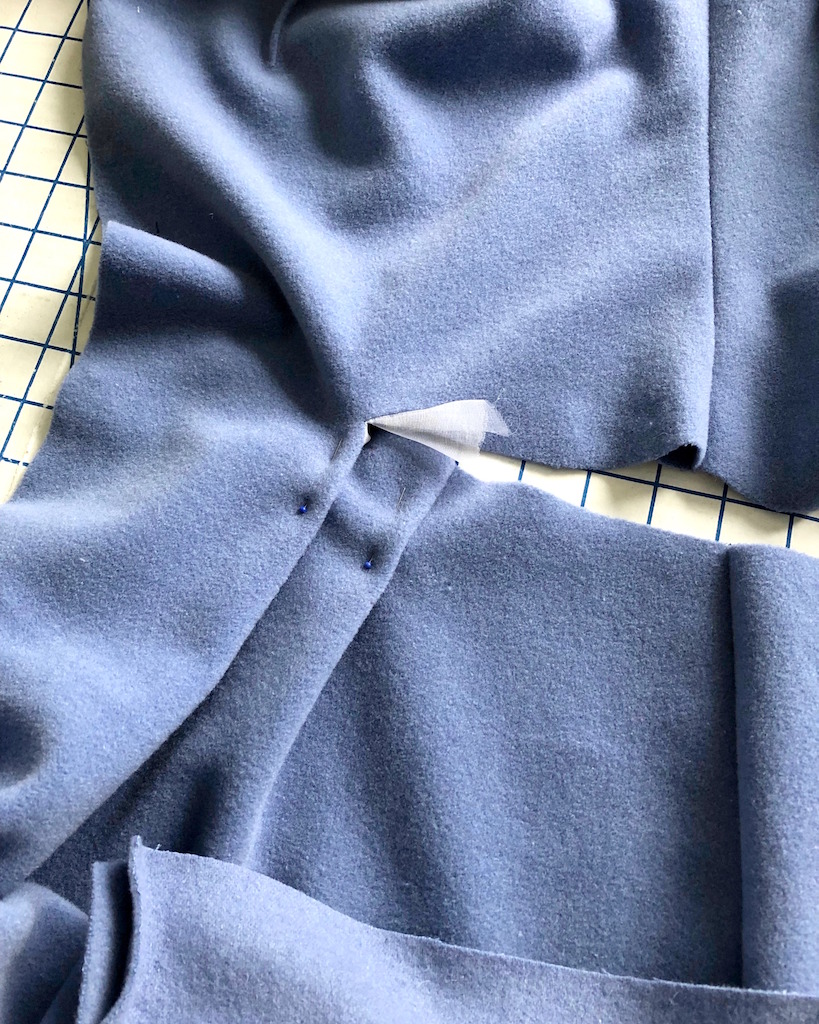
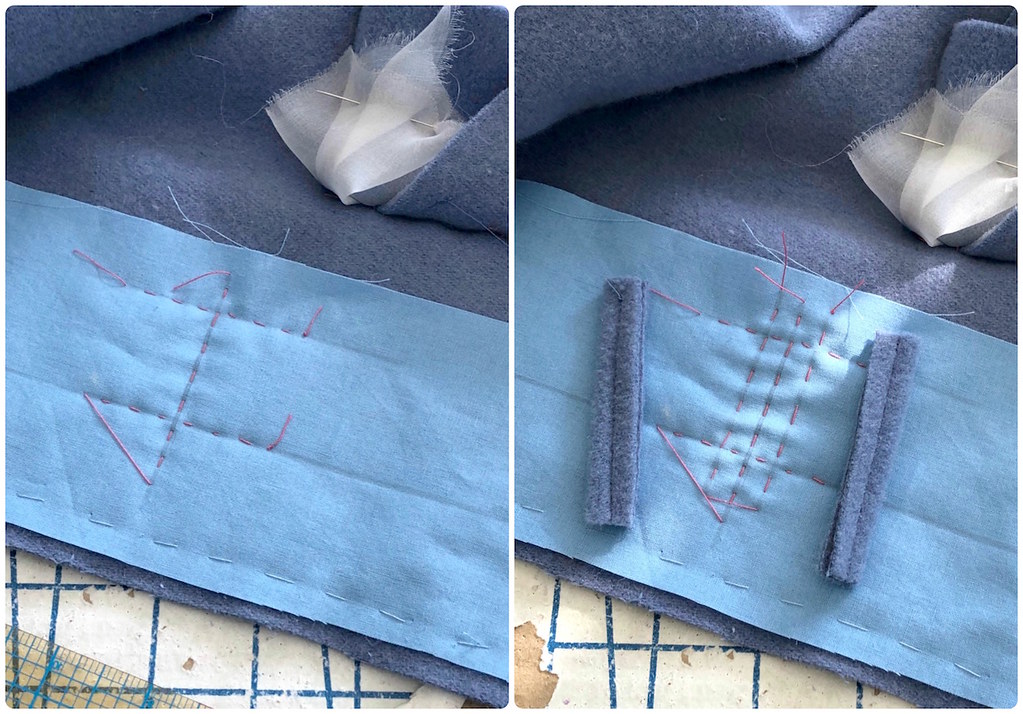
One of my favorite parts of the coat design is the pleating in the front skirt. To construct this portion of the coat, it is necessary to clip into a reinforced corner. The instructions suggest that a line of stitching will do the trick, but I prefer to go the extra mile with a scrap of silk organza.

This wool doesn't really fray all that much, but it still makes me much more comfortable to have an added layer of protection when I am slicing into corners.
At this point, the entire body of the coat is attached at the shoulders and the side seams of the bodice and coat, but not the dropped waist seam.

The pleats are then basted into place. I did this by hand with silk thread, knowing that I did not want to fight removing those bits of threads later in the process.
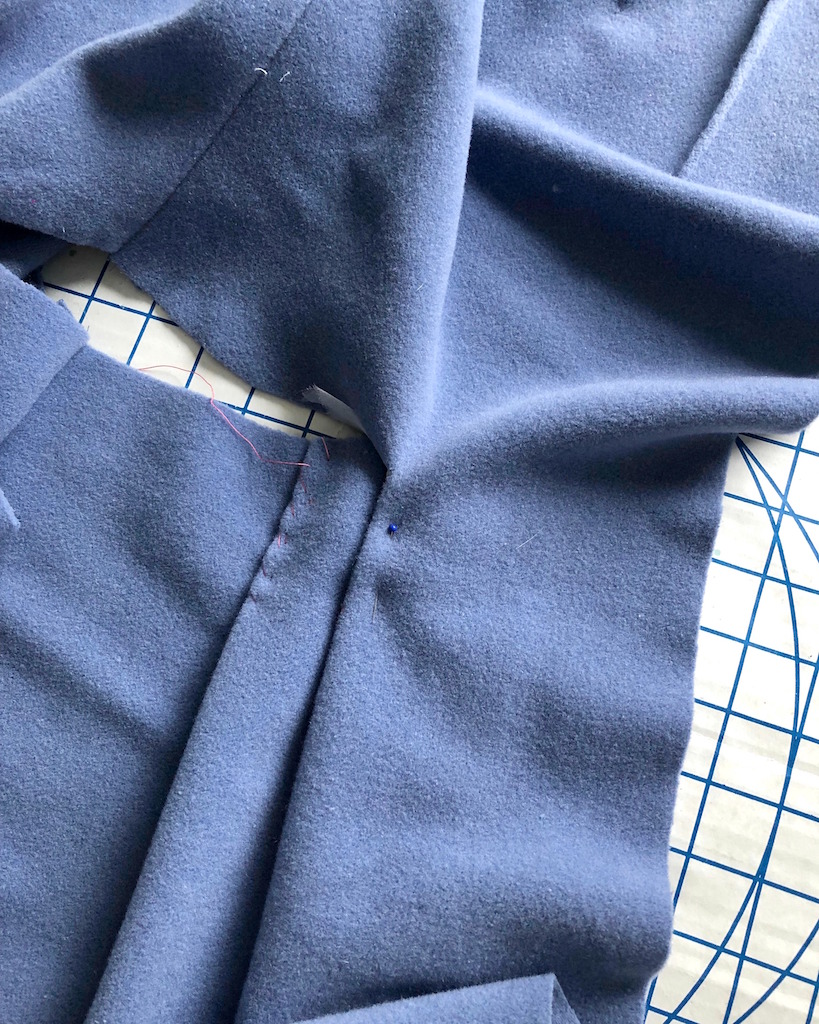
And then it was time for the lapped waist seam. I marked the seam lines in chalk on the wrong side of the wool as best I could, and thread traced those seam allowances, making them visible from the right side of the fabric.
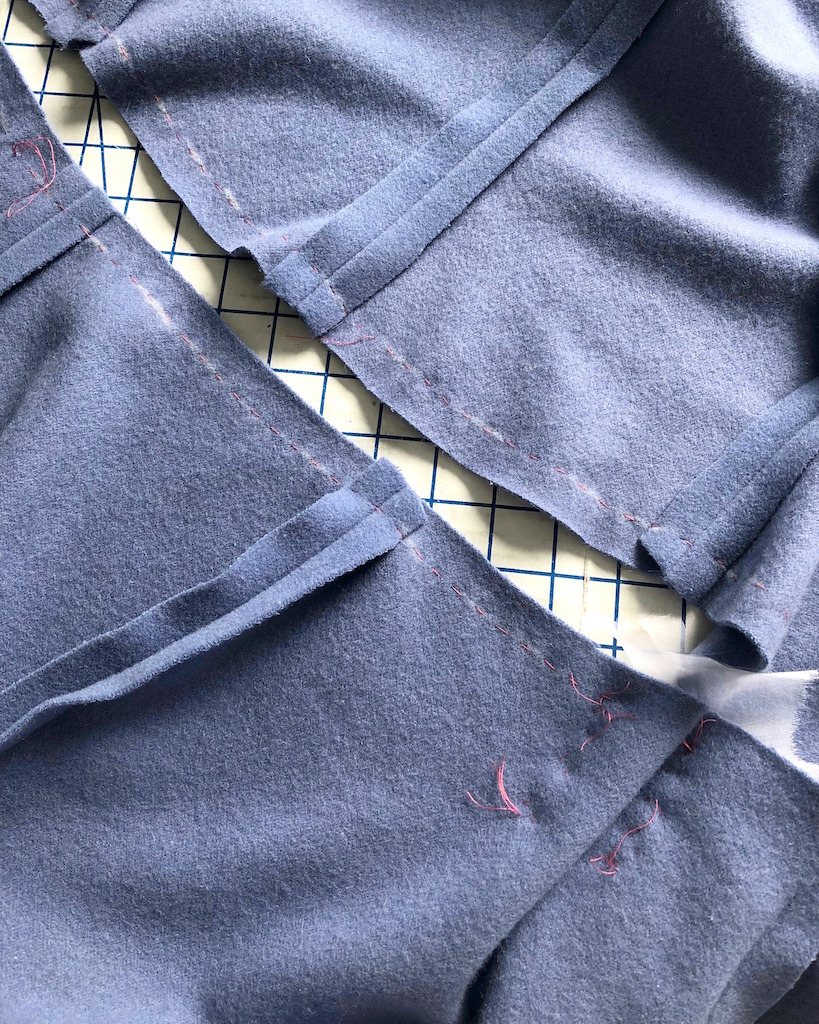
Then that seam was lapped and basted into place by hand.

The coat was fairly heavy at this point with all of that fabric, and there was no way that topstitching that bulky seam was going to go perfectly without a little bit of basting help!

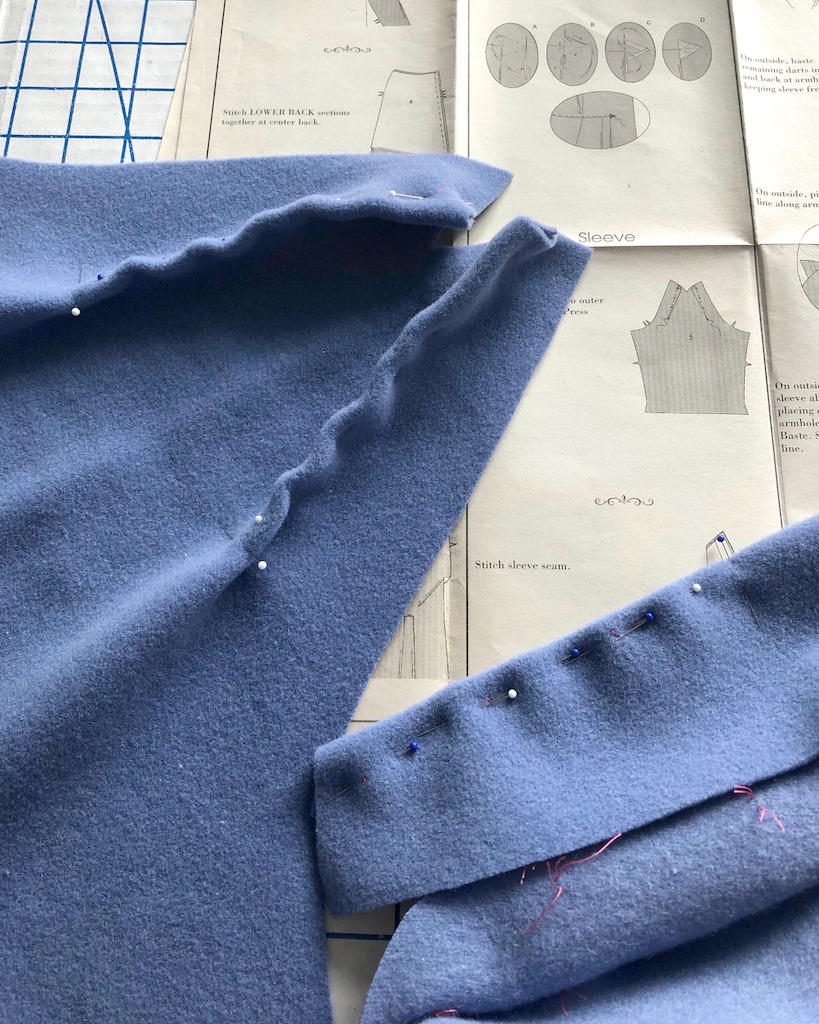
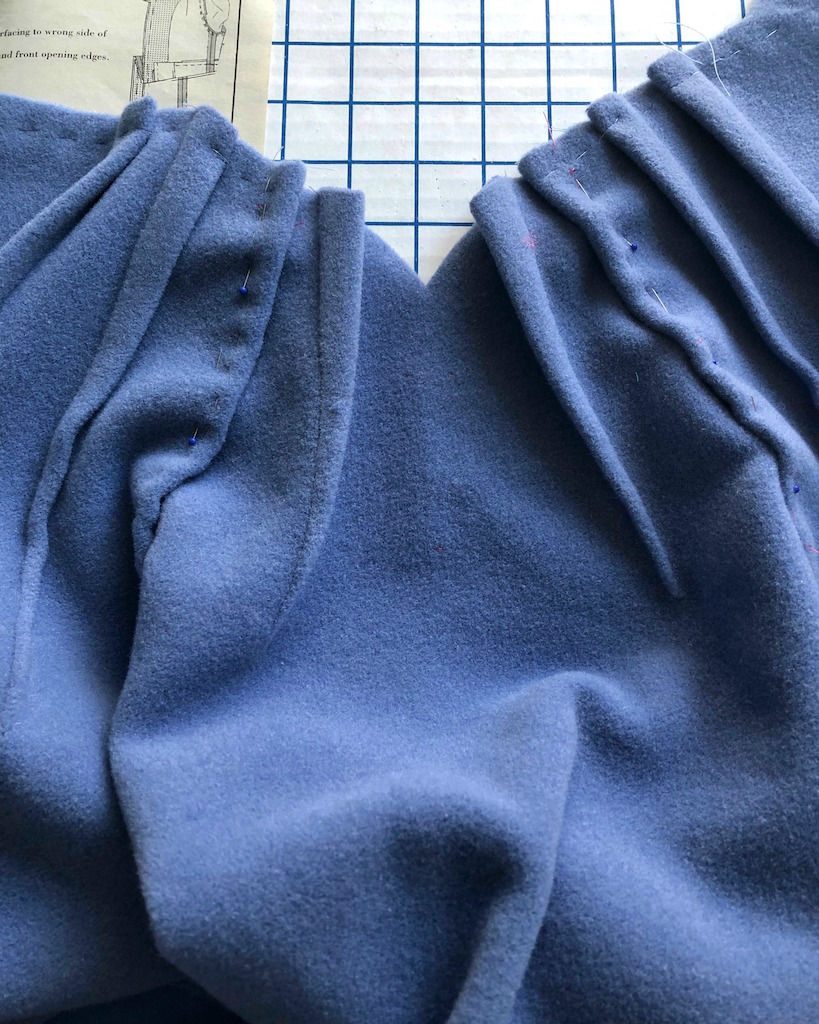
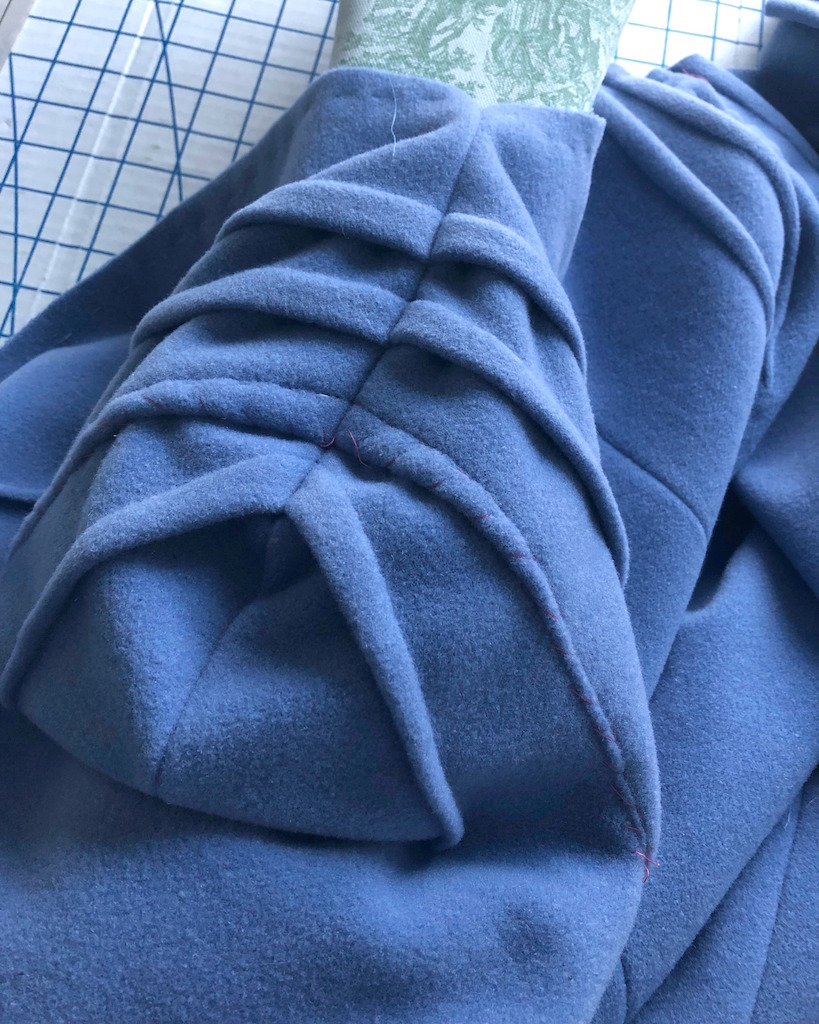
One of the first things that drew me to this pattern was the exposed darts. They are used (rather ingeniously, I think) to attach the sleeves to the front and back bodice pieces.
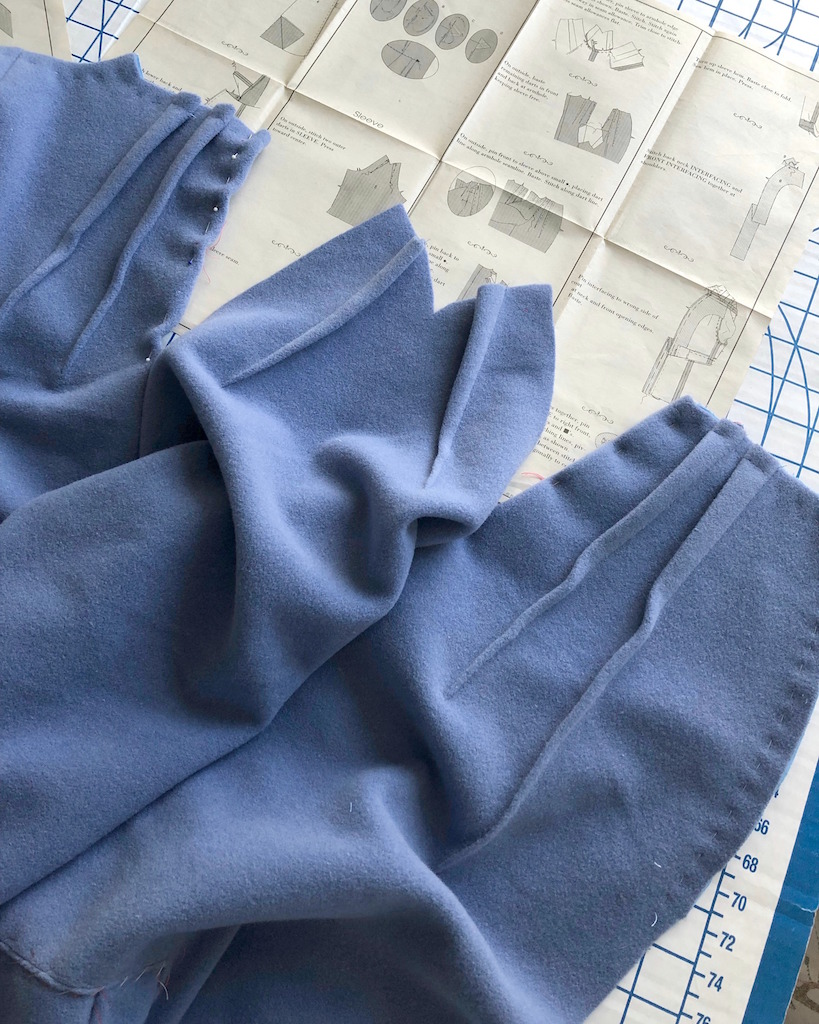
First, the underarm seamline, from notch to notch, is stitched as normal. The outermost dart on front and back bodice is basted and the lapped over the edge of the matching sleeve, and finally, stitched along the dart.
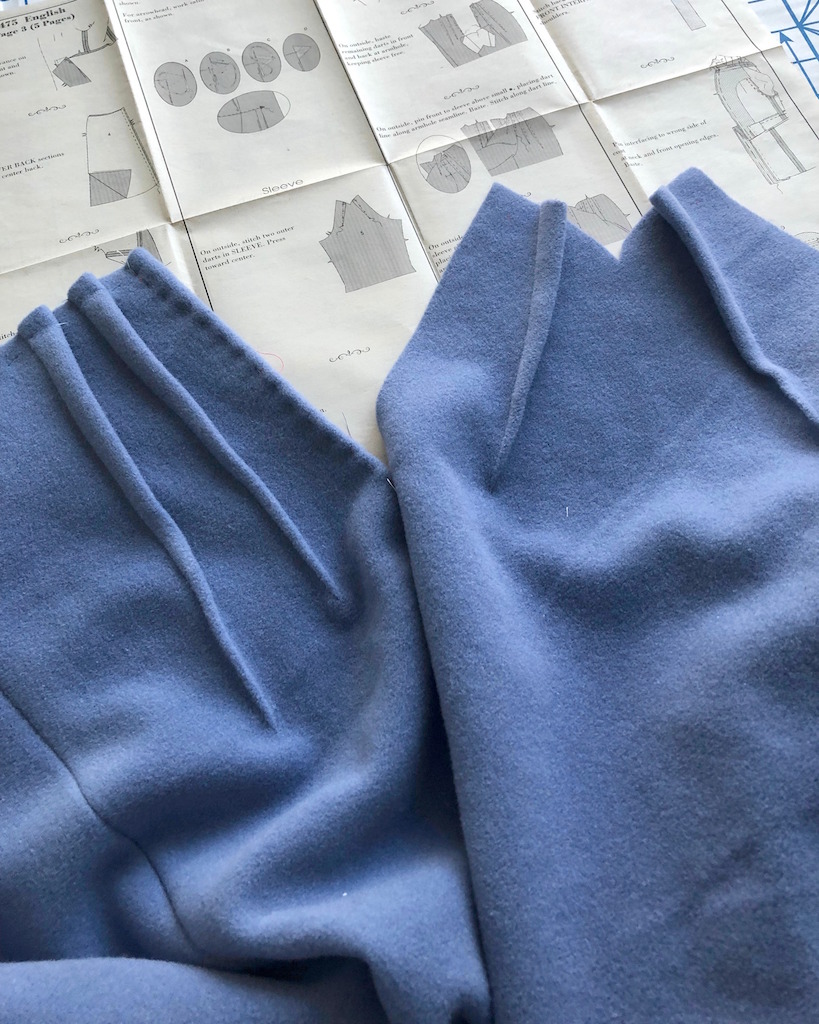
The final step is to fold the sleeve right sides together to stitch the shoulder seamline.
This is the first coat I have ever come across that is constructed in this manner. There really is nothing like vintage patterns and designs when it comes to clever construction techniques!
The coat is closed with a single button at center front.
I worked a bound buttonhole (of course!) but used the technique that is similar to a welt pocket instead of my favorite bound buttonhole. The two separate lips work especially well with thicker fabrics. I can think of two other modifications to bound buttonholes that I have used in the past . . . my choice really just depends on the fabric I am using and the look I am going for.
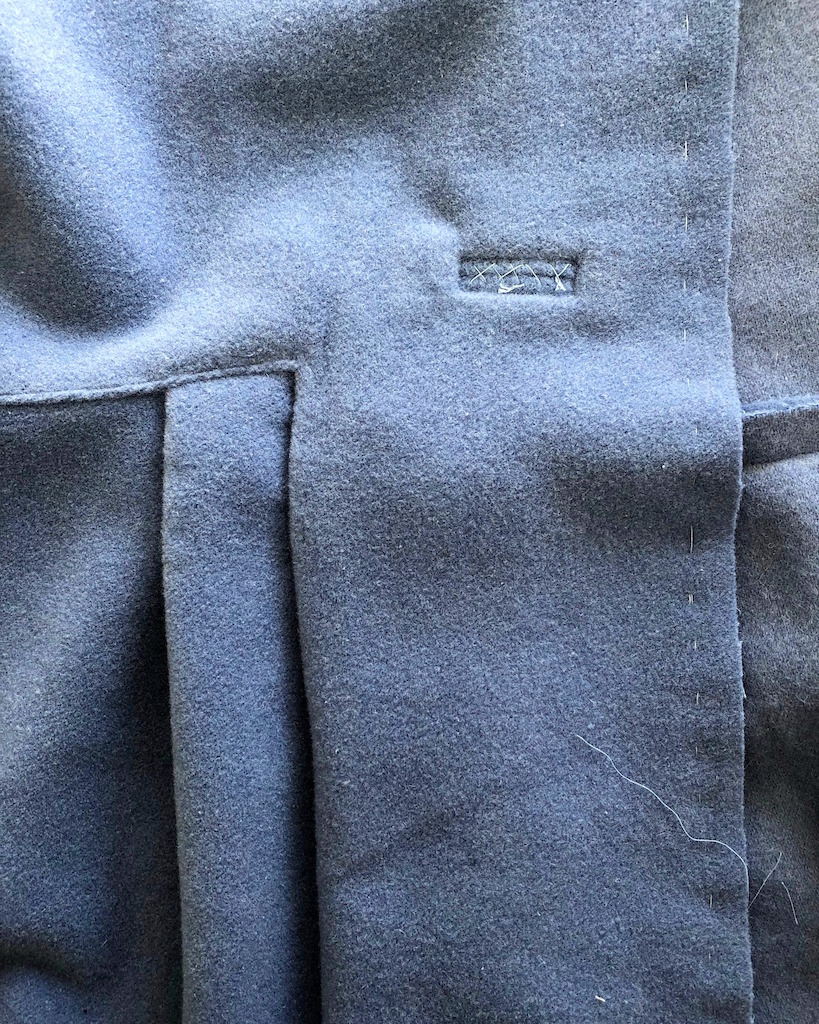
I added a piece of seam binding to the front opening edge for stability. Twill tape works too, but it was easier to lay my hands on the seam binding. (There are issues with reorganizing the sewing room - some things have a habit of playing hide and seek until they find their new forever home.)

And that's probably enough for today. I will get through the rest of the construction photos soon!
Even with the illustration and your wonderful description, I am as confused as I am delighted by those sleeves.
ReplyDeleteGenuine vintage patterns, combined with your taste in fabric and construction enhancements, make for great entertainment.
"Soon", can't come soon enough.
Lovely pattern! I can't wait to see the finished coat. And also hoping to see your review of the Grammies dresses.
ReplyDeleteEager to see more construction photos. Such professional work— it’s enthralling to watch. And I cannot wait to see you wearing this lovely garment.
ReplyDelete