
Back to this colorful lady . . .
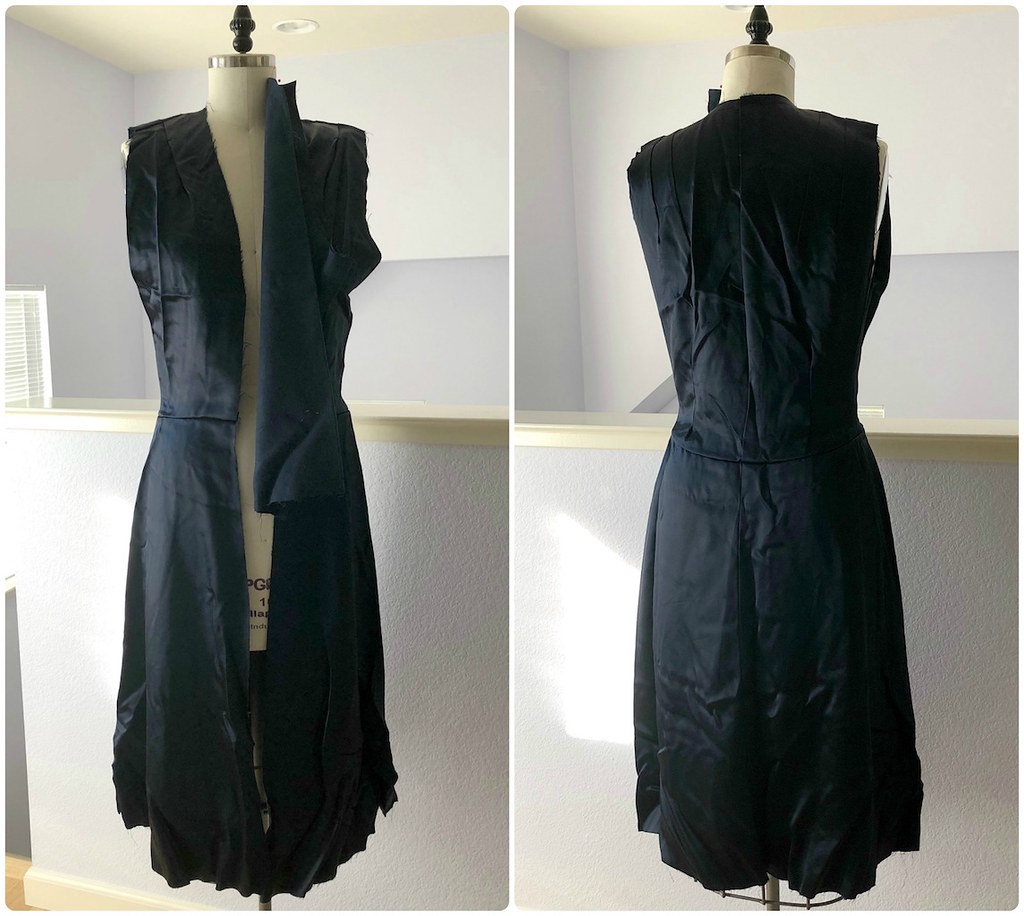
The lining was completed to this point when I pulled the original pink version out of the bag. It's a bit wrinkled, but nothing an iron couldn't fix; which is why I jumped right into the periwinkle wool version. If I had my druthers, I would have picked a slightly brighter blue lining to pair with the lavender toned wool, but I think this works nicely. And it's certainly preferable to being scrunched up and left unfinished in a plastic bag!

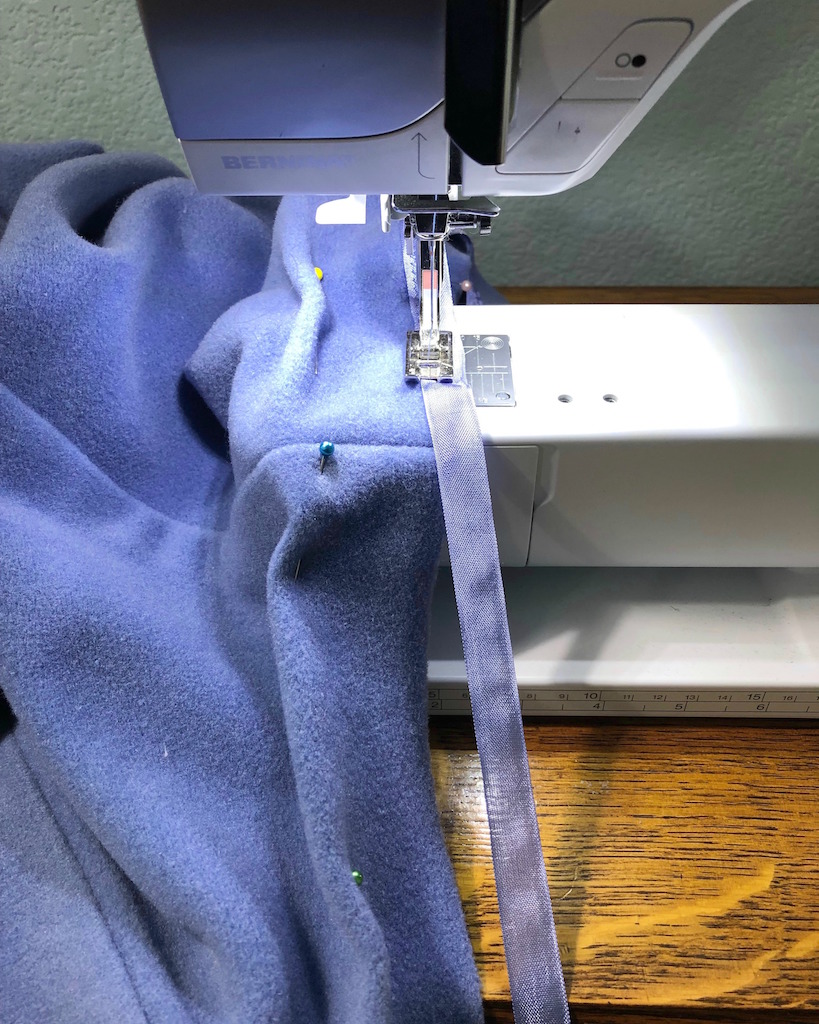
So, to continue with the sewing . . . the sleeve hem was catch-stitched in place on the wool coat.
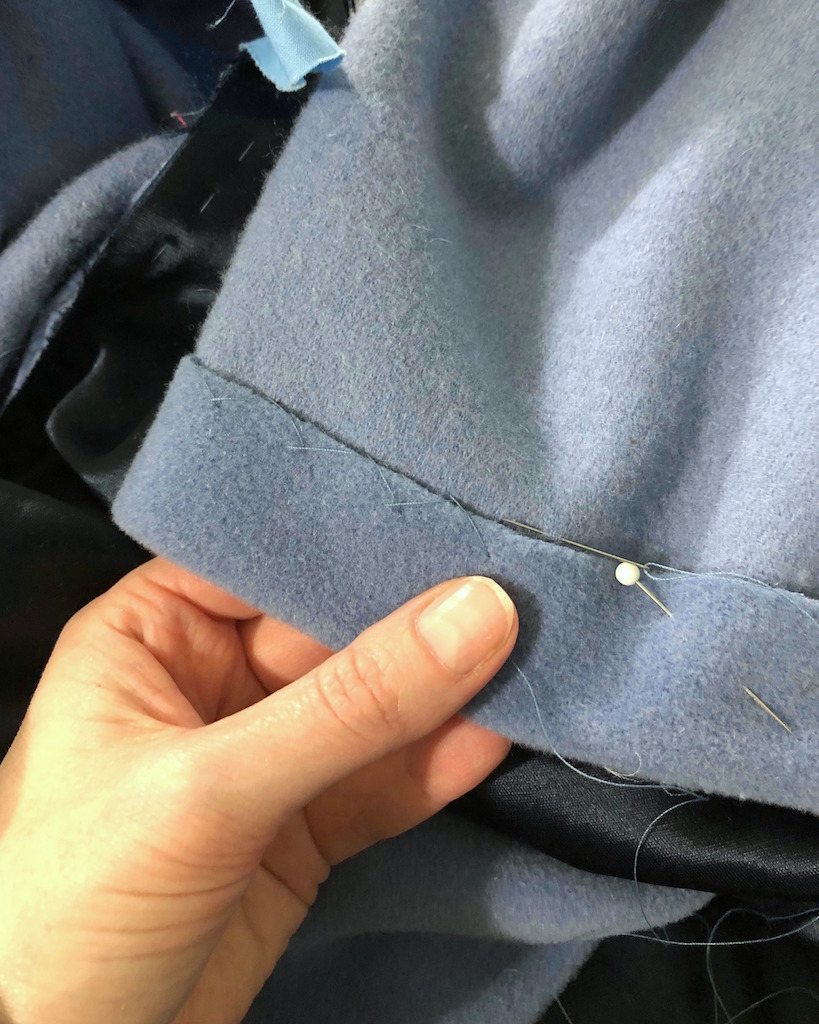
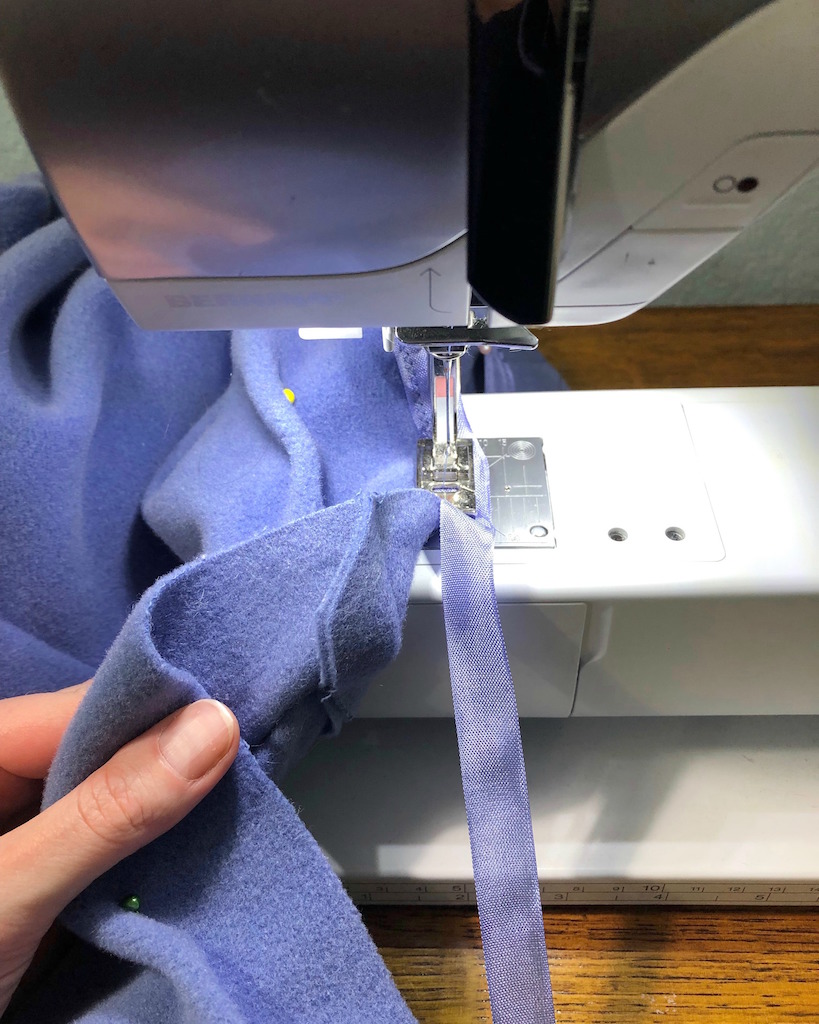
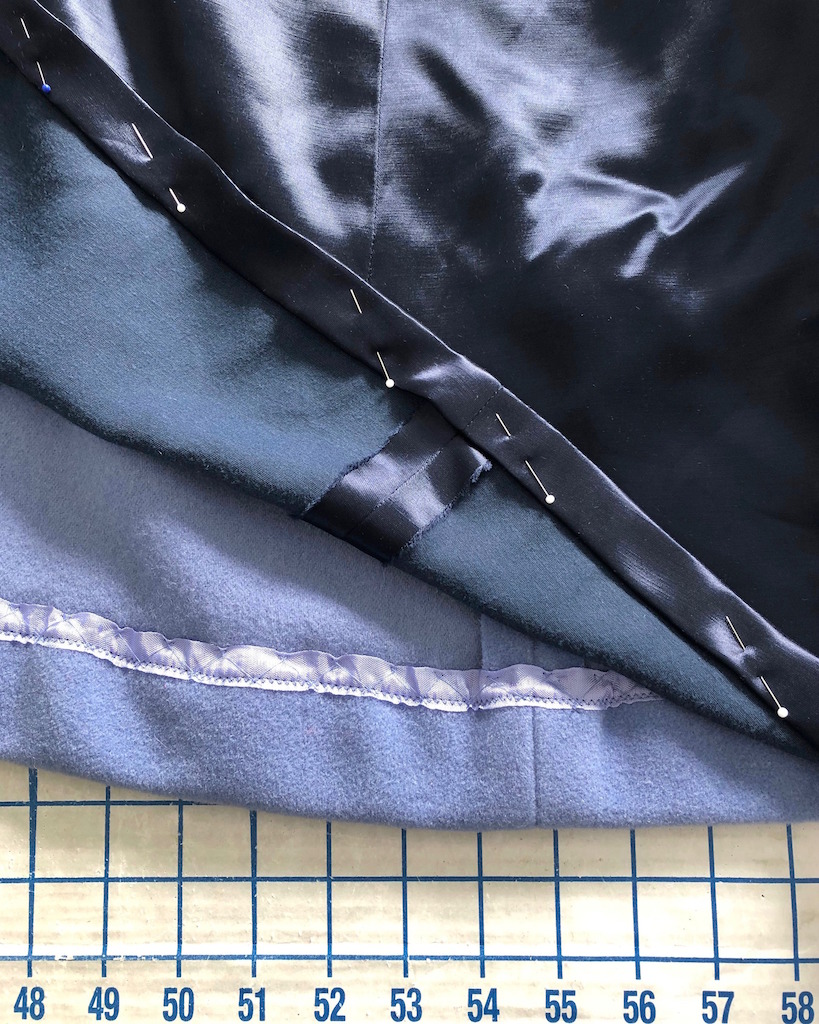
I used my beloved seam binding as hem tape for the skirt hem.
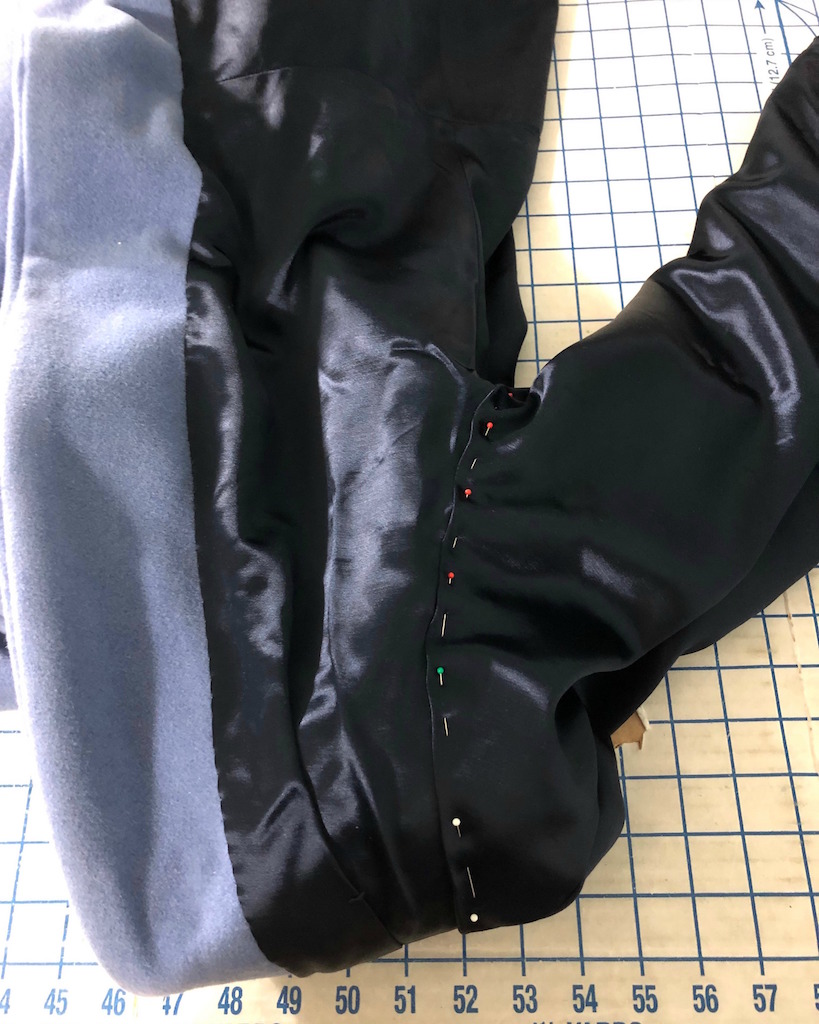
To avoid bulk at the seamline, I clipped diagonally. This particular wool is not prone to raveling, but since the lining hangs free of the hemline, I thought this would be a nice finish.
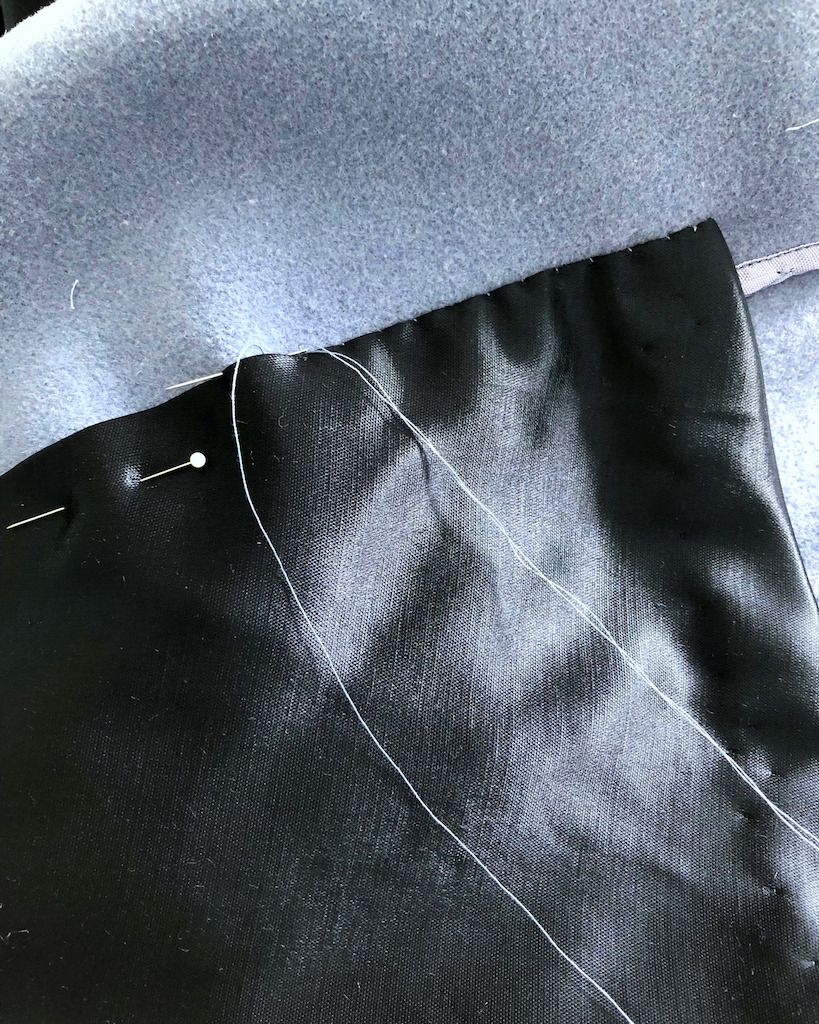
The lining was attached to the shell at the armholes and basted into place. The sleeve lining was then hand stitched to the coat. It's a technique that you often see with vintage coats, and it makes it very easy to remove if the lining ever fails since nothing is machined to the wool.
If you have ever come across a vintage coat, it is likely that the lining fabric has shattered if it is silk, or may have sustained damage over the course of its life. The coat itself, however, is often in excellent condition. So if all you have are hand stitches to pull out, it is very easy to remove the lining sections and replace, giving new life and adding another forty or fifty years to the life of the coat. Alterations are also easier when you can access the innards with minimal effort.

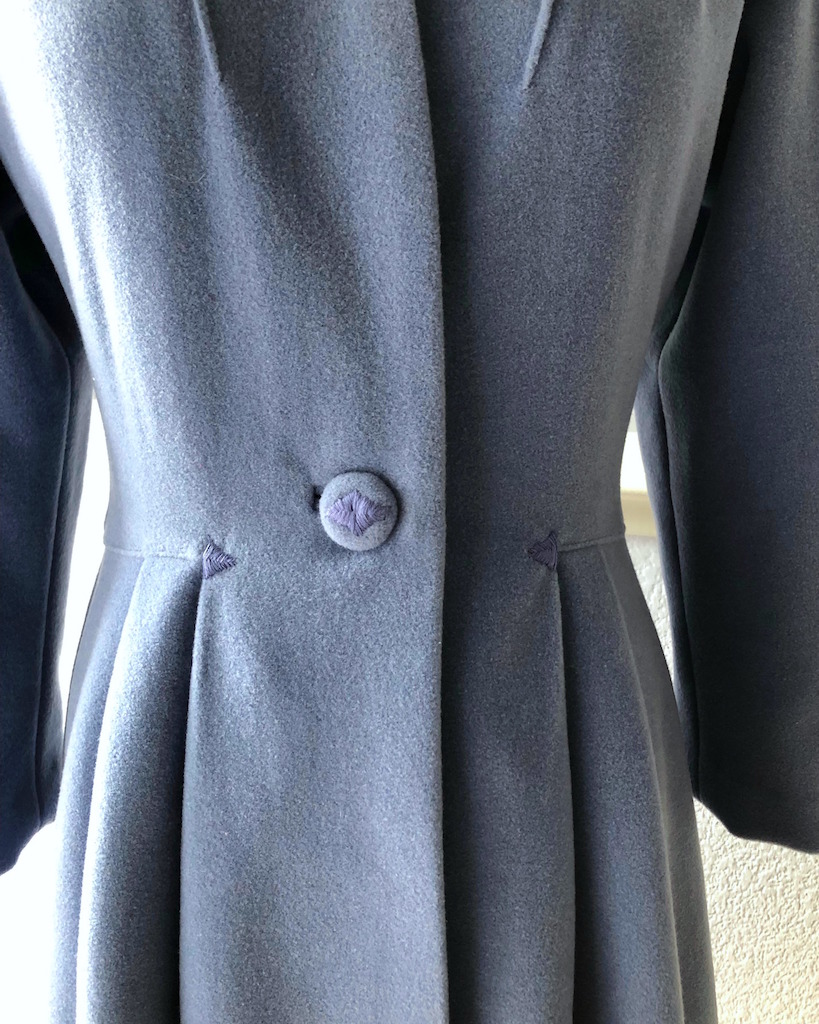
Here is the almost finished bound buttonhole, right next to the arrow tack that covers the waist seam join.

I had a bit of trouble removing some of my basting threads, until I decided to use tweezers - they work great!

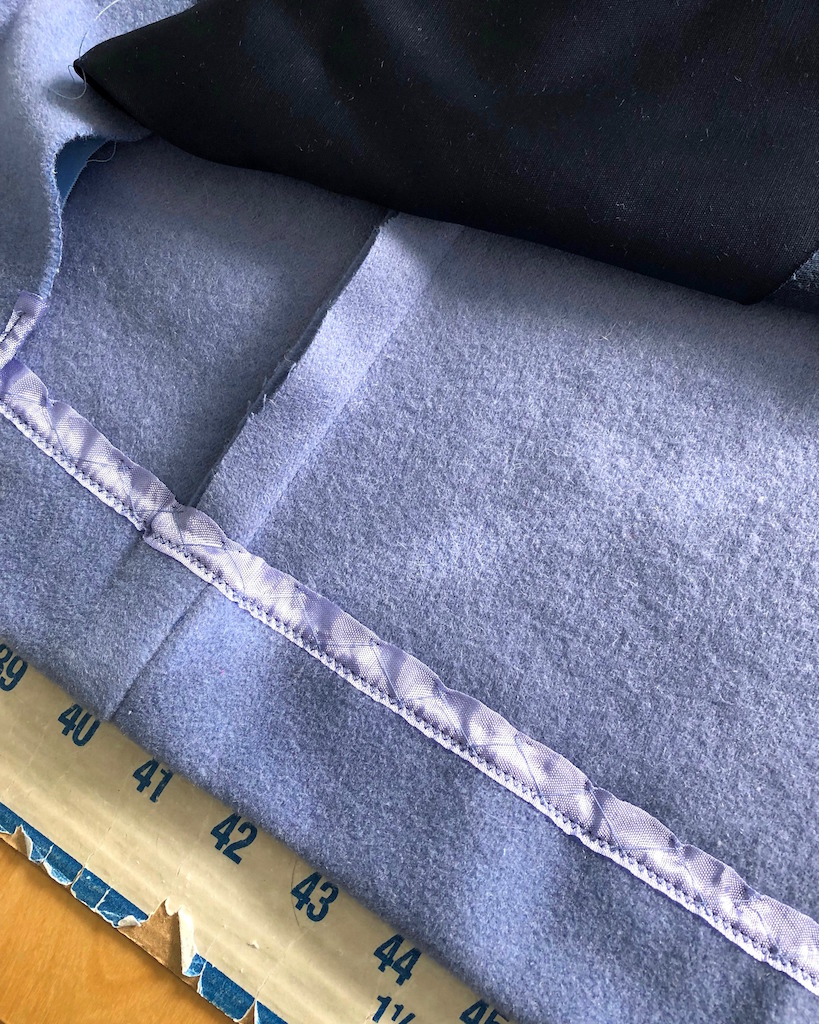
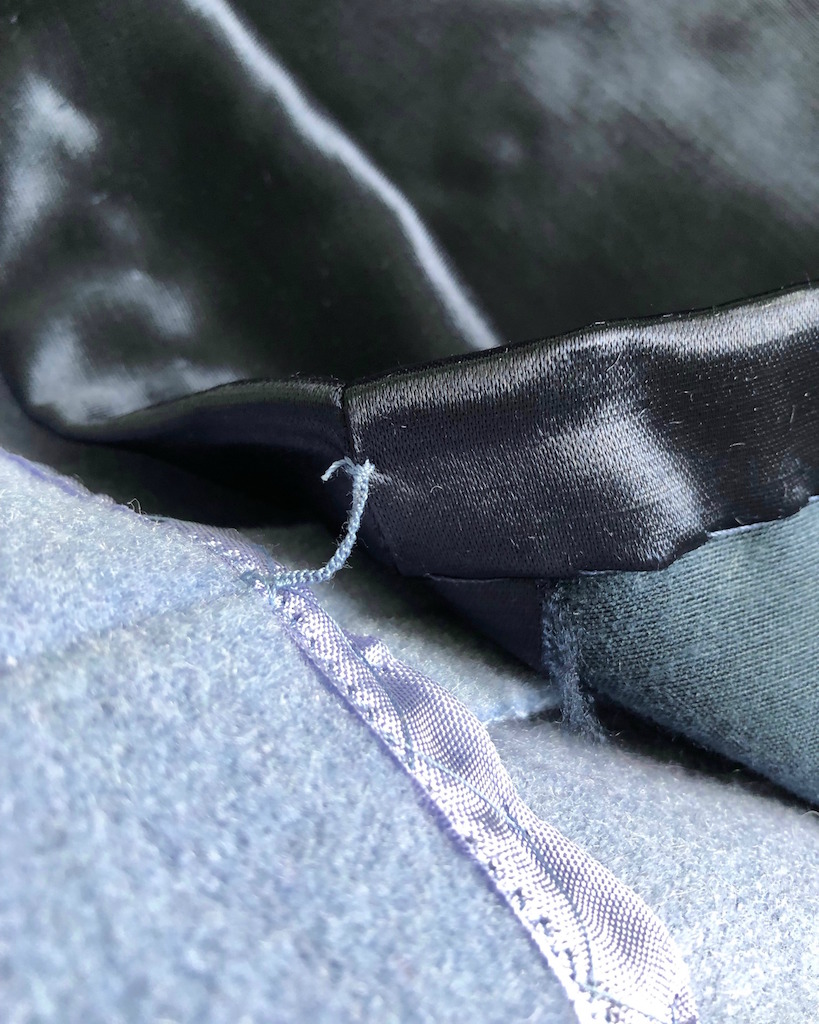
I also used seam binding to finish the small portion of raw edged facing that is not covered by lining.

The facing is trimmed before turning it right side out.

Then I get to do a bit more hand sewing. The catch-stitch is becoming one of my favorites!!
And then everything is really close to being finished.
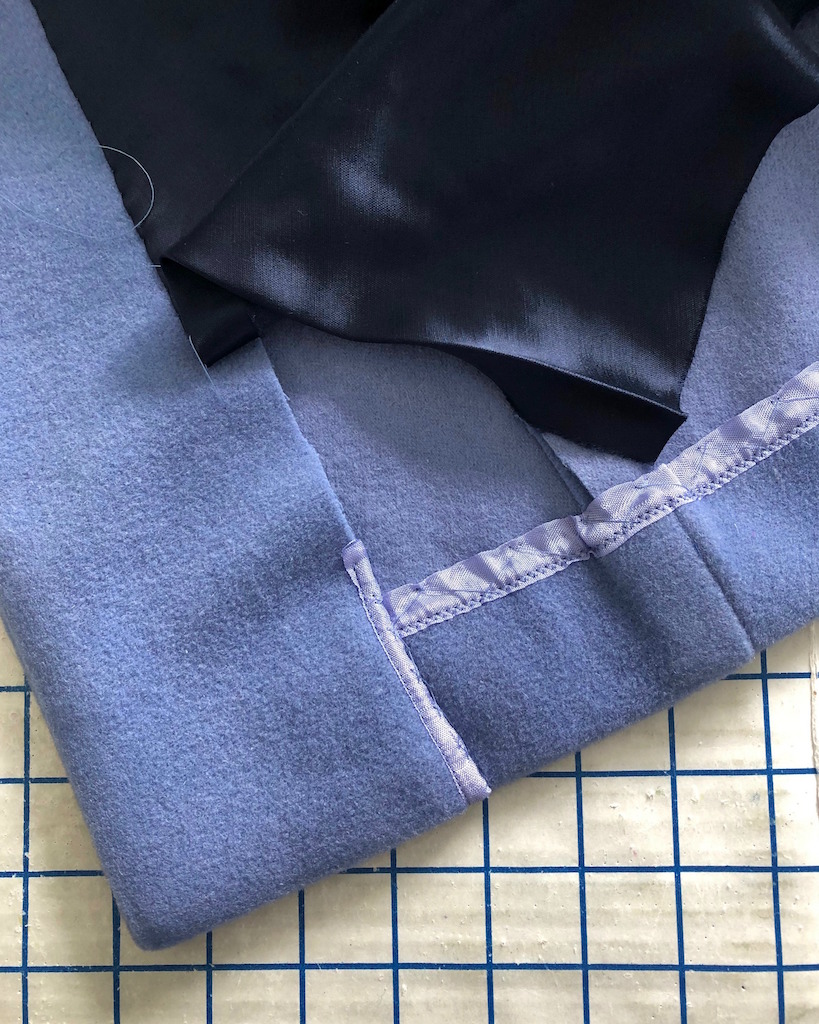
This particular lining is free hanging. Because it isn't all that thick, I decided to fold the lining under twice instead of using seam binding.
Then the lower inches of lining get hand stitched down.

Which covers up the final raw edges of the garments.
To keep the free handing lining in place while being worn, I made a couple of thread tacks to join the lining to the coat at the seamlines.
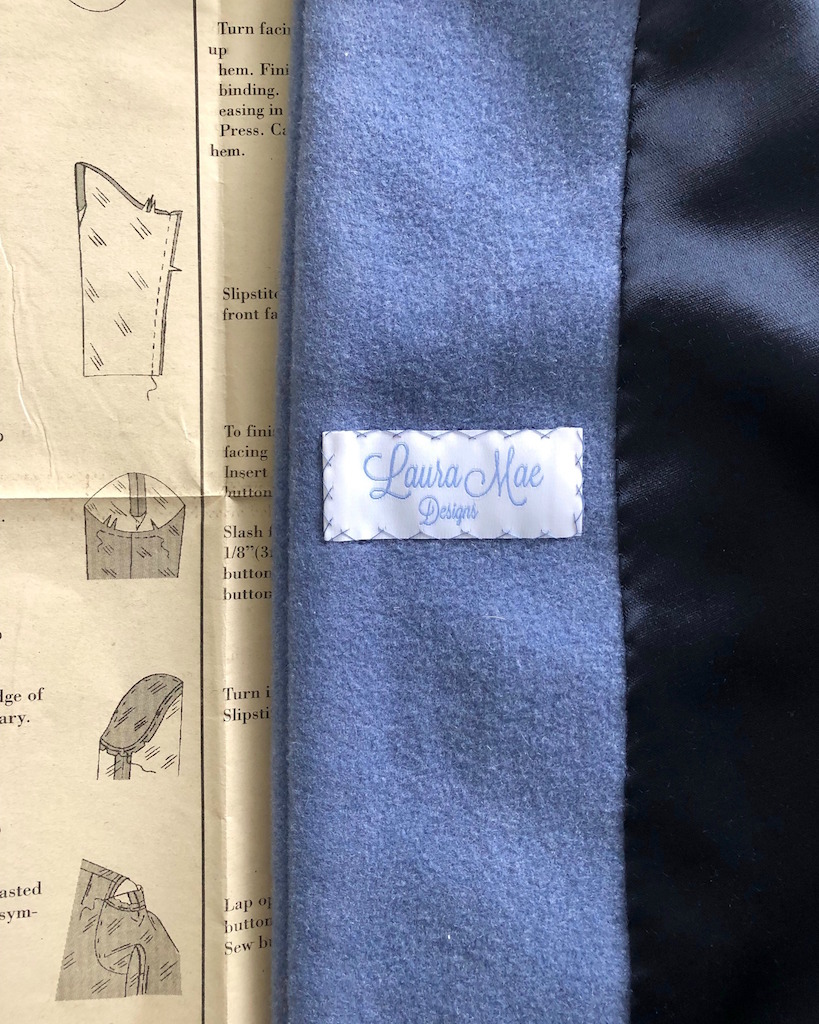
And as a final touch, I added one of my new labels.
I also stitched matching arrow tacks to the covered button to tie those details together.
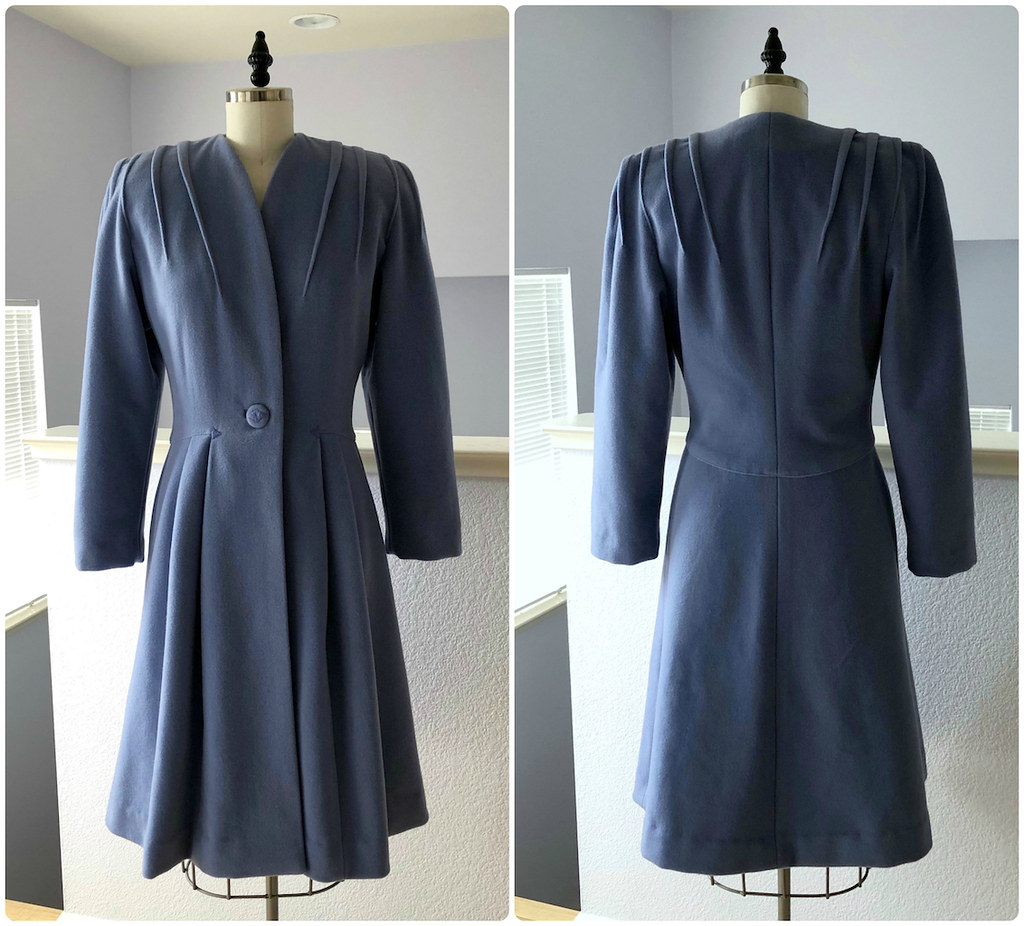
And here is the completed coat!

Absolutely. Marvelous. Just stunning. Your stitching is impeccable. Thank you for showing us this process.
ReplyDeleteIt's almost voyeuristic to watch.
ReplyDeleteYou made a mid-blue velvet dress some years back (not certain you were completely delighted with the dress, but it looked great on you). With a snood, could the dress and the coat meet?
The arrow tacks made me wonder if you hadn't made this coat in a past life.
Laura Mae, you have truly outdone yourself this time.
There was definitely a snood involved in the outfit! And while I didn't choose that particular blue dress, there is another 1940s reproduction that I chose to compliment the coat.
DeleteGorgeous - just gorgeous!
ReplyDeleteOh wow! A beautiful garment.
ReplyDeleteWhat an amazing coat, your work is impeccable.
ReplyDeleteA question: why is the advice to throw away old spools of thread (claim is that they will disintegrate) yet vintage garments aren't falling apart as the thread disintegrates. So why do they caution us to toss old thread?
I think it's often because you can't tell how they were stored. If they were sitting in the sun for 20+ years, the thread will often be rotted out on the spool. But I think the Susan Khalije recommends vintage silk Belding Corticelli. You just have to make sure the thread is still strong!
DeleteAnd I have come across vintage dresses where the seams are coming apart because of rotten thread, but they are usually easy to fix, and few and far between as most have held up really well! (Probably another case of not storing in proper conditions - I wish people wouldn't get their ideas from Pinterest and hang vintage on the wall permanently in the direct sunlight for years at a time!)
Absolutely gorgeous! Thanks so much for sharing the process. Your work is an example to (try to, haha) follow.
ReplyDeleteMonique
beautiful, and those hand stitched arrows are fantastic.
ReplyDeleteSimply beautiful, your hand sewing is beautiful. Everything you make is perfection.
ReplyDeleteI love your attention to detail. Various little things were brought to my attention like the hand design on the button and at the edge of the pleats. Just beautiful.
ReplyDeleteVery impressive!
ReplyDeleteBeautiful coat! Wonderful tailoring and details!
ReplyDelete