When I first conceived of the idea of making a quilted skirt, I planned on making a facing for the hemline.
I did not want the inner layer to show when worn, and a deep hem on a flared skirt is not the neatest finish.
Unfortunately, I did not have enough of my twill fabric to make a facing for the hemline after cutting out the skirt pieces, and I did not want to purchase any more fabric for the project.
I decided that the length of the skirt was long enough so that only Valentino (and other creatures standing 12" tall or less) would be able to see the inside of the skirt around my ankles, so I cut bias pieces out the leftover twill to bind the raw edge.
That bias fabric was applied to the front of the skirt and wrapped around the edge. With that finished edge, I then folded up the hem and stitched in place by hand.
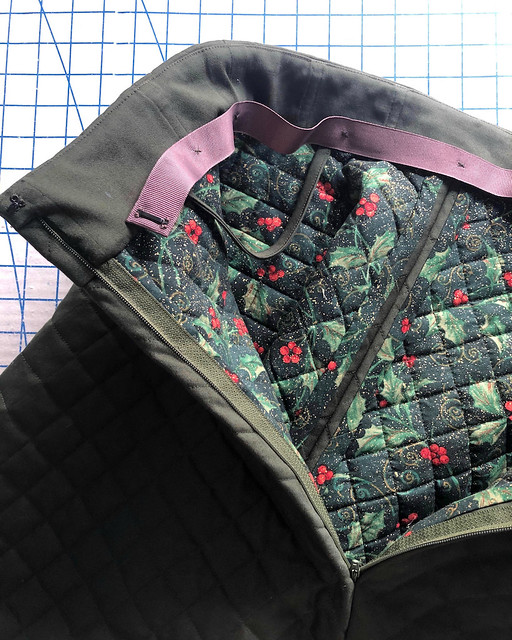
I cut, quilted, and stitched together a shaped waistband. A few boning pieces were added to the waistband lining, along with a bias piece of twill folded over and finished to create hanging loops, one on each side of the skirt.
And remember when I said that I would cut one size larger because of the bulk of the skirt? Well, that was a mistake. Instead of needing more room, I needed less because of the weight of the skirt itself.
A waist-stay was added to the inside of the waistband to help hold up all that weight and cinch in the waist measurement slightly. And a regular zipper was applied to the center back seam because there was no way an invisible zip could handle the bulk and live to tell the tale!
Overall, I am very pleased with this skirt. In fact, I think I need to make myself a quilted petticoat sometime soon because this thing can stand up on its own and would make an excellent crinoline substitute!
Why is it that time consuming projects always come to mind when deadlines are imminent?
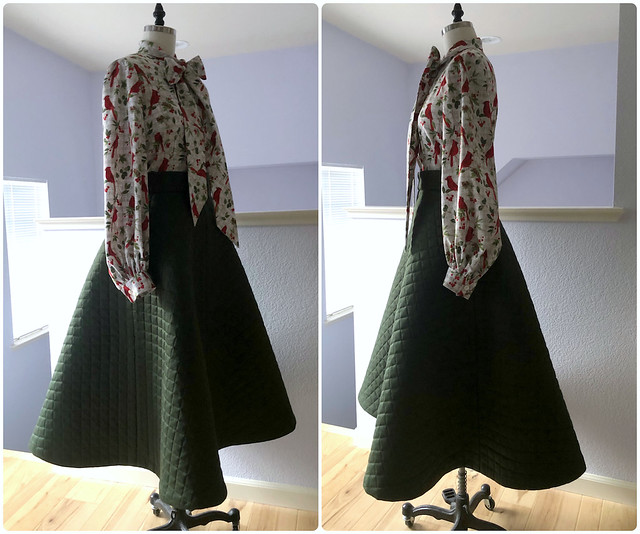
In this case, as I was finishing my cardinal blouse, I thought it would be a great idea to make a matching full skirt to wear with it. And then I thought, how fun would it be to make a quilted skirt to match. And why not quilt my own fabric, since finding pre-quilted fabric that I like was not likely to happen in a short period of time.
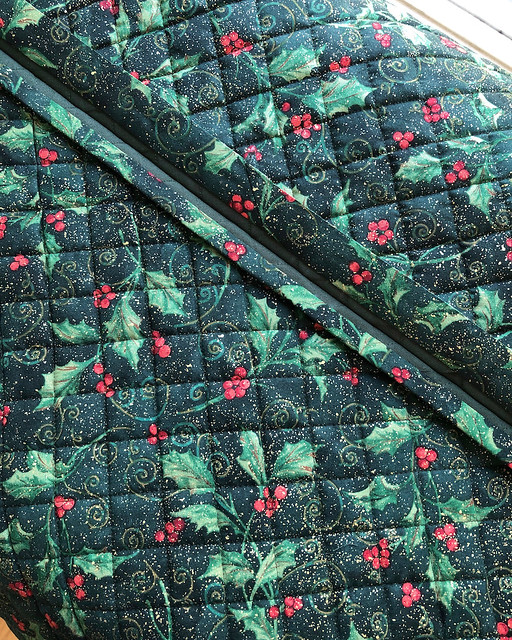
After a trip to the store, I had two layers of fabric plus a lot of batting to play with. The underlay is a holiday themed quilting cotton (sale priced because of the impending holiday), and the solid green is a cotton twill with a bit of stretch. Yes, I thought the stretch might be an issue, but I really wanted something thicker than quilting cotton. In the end, a mid-weight quilting cotton probably would have worked fine and had just as much body as the twill. And while I love the wrinkled look of antique quilting made with cotton batting, I decided against that for a garment and purchased the easy to find poly sew-in batting.
After cutting a wide margin around the skirt pattern pieces in all three layers, I stacked them together, drew a chalk line along the cross grain, and started quilting. And I would like to say just how impressed I am with those of you that machine quilt large expanses of fabric with regular machines. It's hard work wrangling all that fabric through the machine!
I know I have heard of spray basting some sort of glue to keep the layers together, but that seemed like an accident waiting to happen, so a few pins strategically placed kept things in place, for the most part. The small amount of stretch in the twill gave me a bit of grief, but nothing too terrible. I was also concerned after my first pass of (somewhat) parallel lines that the batting I had chosen was much too thick. But after the second pass created a (mostly) square grid, that poof factor was much more under control.
The next step was to trim the quilted pieces to size. I decided I would cut one size larger than normal to account for the thickness of the fabric, and marked the outline in chalk. This seemed like the easier way to do things, and it worked quite well. If my pattern pieces were more complicated I might have been annoyed, but for a straightforward skirt with two pattern pieces, this worked nicely.
I also added three inches to the length of the skirt. Might as well be completely covered in a quilt in the Winter weather, right?!
And then I just kept going with all four sets of fabric pieces.
And somewhere in the middle I really wanted a long arm quilting machine. Never mind the fact that one will not fit in my empty sewing room, let alone with all the other tables and accoutrements that are currently living in there! I definitely understand why they exist and how lovely it would be not to have to fight masses of fabric through a standard sewing machine.
But I got through it in stages . . . quilt one piece, cut something out, go back to quilting, stitch a seam together, cut some bias strips . . .
Which is how I decided to finish my seams. My Hug Snug would be no match for the thickness of this fabric, so I bound the seams with leftover bits of my lining fabric.
And while I was posting progress images to Instagram, everyone kept saying how lovely the print side is; to be honest, I think so too. But the original idea for this skirt was to add another winter skirt to pair with other blouses and tops to the closet, and a holly print, no matter how pretty, is decidedly holiday, and not the look I was going for.
I have to stay, though, this makes me want another quilted skirt, this time out of a print!
And while I am not quite ready to tackle another, and the expert machine quilters out there will be horrified that my square grid went off the reservation a couple of times and has a definite drunken look to it, I think the overall appearance of the skirt will make up for the messy quilting. I hope!
After loving the way this year's Halloween dress and last year's Christmas dress turned out, I decided I wanted to make another Christmas garment using a novelty print. And I found an adorable print! I also decided I wanted to use bits of multiple patterns to create my perfect holiday dress. But first, I would have to test the fit of at least the bodice portion of a new to me pattern, and make sure the sleeve modification I wanted to try would turn out as expected.
But instead of making a muslin, I decided to use a cotton print so I would hopefully end up with a wearable muslin.
Coincidentally, I picked up yet another cardinal print! I definitely am drawn to prints that showcase these colorful birds. And I wish they lived on the West Coast so I could see them for real. But back to the sewing. . .
The first step was to combine the armscye of Vogue 8772 (the shirt pattern I wanted to use for my dress) with the dramatic sleeve of McCall 8358. I did this the lazy way . . . just layering the two pattern pieces, one on top of the other, and cutting out the portions I needed.
And it worked! I also decided that since I was using the fabric hogging sleeves, I would also go for the fabric hog that is a bias cut neck tie. It's a little over the top, but I love it!
The major problem I ran into was my Bernina automatic buttonhole foot. It has worked in the past, but I really have nothing but trouble with it. And ironically, this was the feature that the woman at the store said I was going to love. I snidely told her that I don't use machine buttonholes and much prefer a bound buttonhole. My machine is now getting back at me for my snobbery.
I ended up pulling out another machine and doing the old fashioned, step by step, machine buttonhole. They turned out okay, but having to wind a bobbin for a different machine was aggravating. Should have stuck with a bound buttonhole. Except this is a wearable muslin, so I didn't want to bother. Grrrrrr.
In the end, I got through the buttonhole mess.
And I am pretty pleased with the outcome! Of course, I have run out of time for my holiday dress because I started quilting a skirt to match my new blouse . . . but that's a story for another day. And there is always next year.
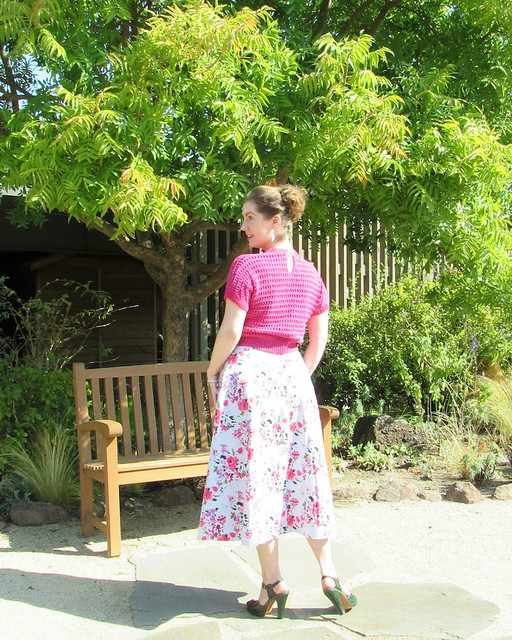
I haven't been in much of a knitting mood lately (except for my Owls Sweater), but I did finally manage to photograph one of my hand knit sweaters for the blog, in the same year I finished it. It's a miracle!
The sweater is a vintage pattern I found on the Buttons and Bobbins blog a few years back.
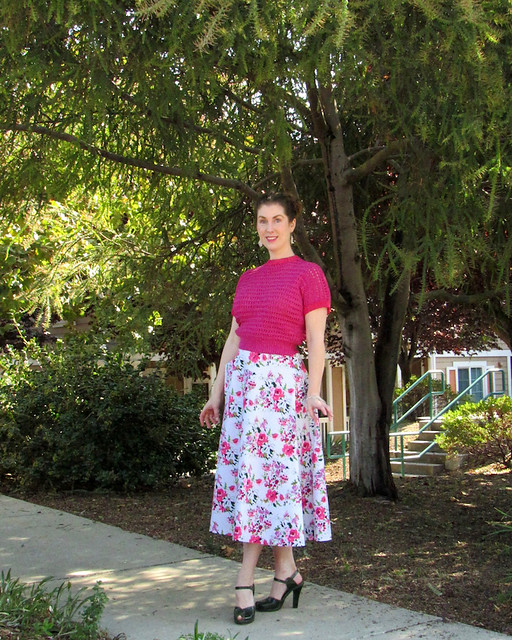
When I found some lovely pink yarn at an estate sale but didn't have very much of it to work with, this cropped sweater pattern came to mind. And I knew that the color would match nicely with my Simplicity 8458 vintage reproduction skirt.
Of course, it turns out that I needed one more skein of the out of production yarn, and I thought I found a match on Ebay. Unfortunately, it was a different tone of pink.
Lucky for me, it somehow matched another shade of pink in the skirt print, so I used it for the neck and sleeve ribbing. Clearly, the match was meant to be!
I shortened the length of the sweater slightly to wear with a high waisted skirt.
After seeing the photos, it looks like I could have shortened it a little more, especially at the back. I think part of that issue is the fiber content (cotton & rayon).
But even with that issue, I am very pleased with how this sweater turned out. I may even have to make one in another color next summer!
Sweater: Made by me, "A Cap Sleeved Jumper"
Skirt: Made by me, Simplicity 8458
Shoes: Remix "Miranda"
Earrings: Made by me
Ever since I was given some fabulous beaded trims, I have been trying to think of a project where I can put them to good use! The most obvious choice is a 1960s silhouette, so I dug around in my stash of vintage patterns and found this one.
But before I started cutting into my precious trim, making up a wearable muslin was a must. And I am glad I did.
I really didn't have enough of this directional print to cut everything out, but I managed by piecing the sleeves. With the busy print, it's not very noticeable.
And, it turns out, I probably did have enough yardage since the pattern has massive seam allowances included. That, or this dress was drafted for something over six feet tall! I took about 3 inches off of the sleeves and almost as much off the skirt hem.
Which is crazy!
The design is obviously meant to sit above the knee, and it is not possible to hem a flared skirt with such a deep hem, so I cannot figure out why there was so much extra length in both the sleeves and body of the dress. I also usually cut a 34 bust, so this dress came out a little large through the shoulders. The body of the dress was also oversized, but that probably has more to do with the silhouette than the sizing.
I took in the shoulders slightly which made the dress fit a little better, but I am still not in love with the dress. It is incredibly comfortable to wear, but I don't think I have found something I will be making again (especially not with my fabulous beaded trim!).
So I have a new style of dress to add to my closet, but I am still on the lookout for a fabulous 1960s dress worthy of bedazzling. I know she's out there . . . I just have to keep looking!
Dress: Made by me, McCalls 8766
Shoes: Royal Vintage Shoes "Alice Oxfords"
Necklace & Bracelet: Vintage, from Mom