
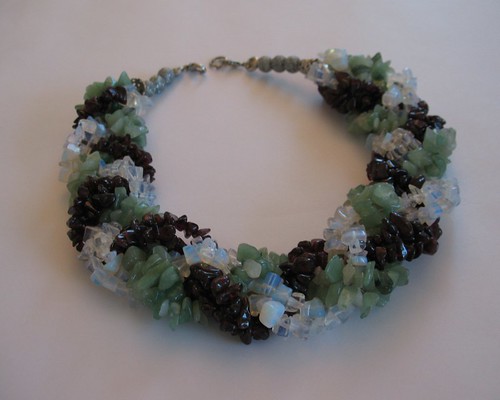
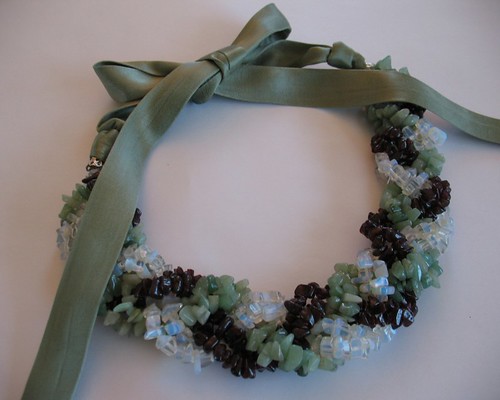
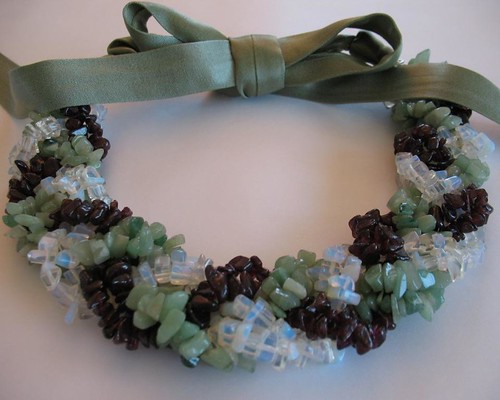
I found this lovely necklace at a farmers market years
ago. It was an amazing deal, and made of
semi-precious stones. I just love the
braided torsade, but not the closure.
The glittery beads at the back of the necklace did not match,
in my opinion – but I could still wear the necklace with my hair down. However, those pesky beads caught in my hair
and scratched the skin on my neck.
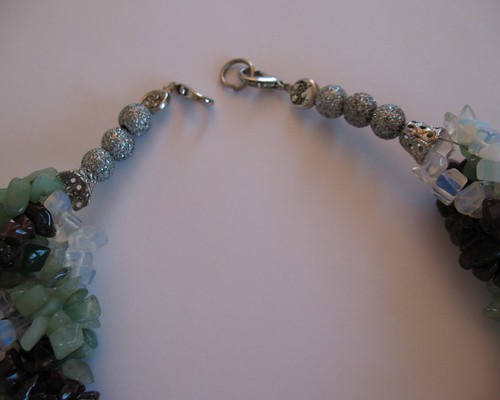
The hook and jump rings were oversized but incredibly
difficult to open. My nails are far from
beautiful, but I do not enjoy tearing them to get a necklace on and off, which
was happening with the clasp. So the
necklace was buried in my jewelry box for years.
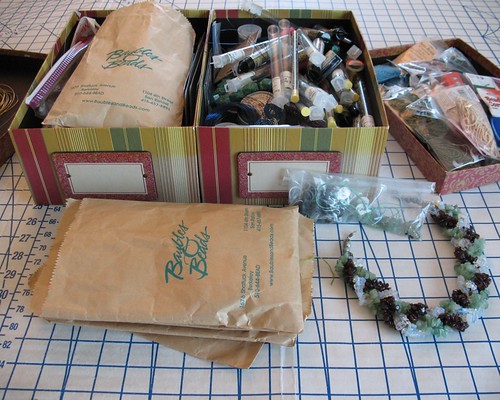
Time for some crafting!
I have boxes full of beads and wires and findings, but rarely use them these
days.
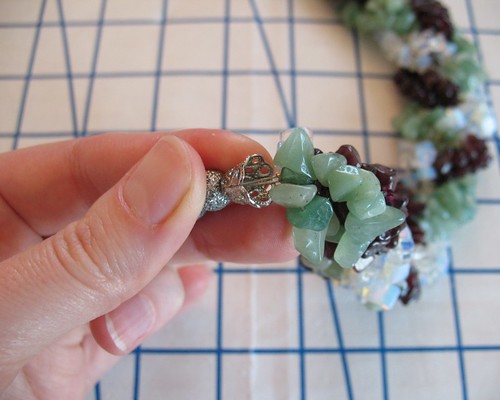
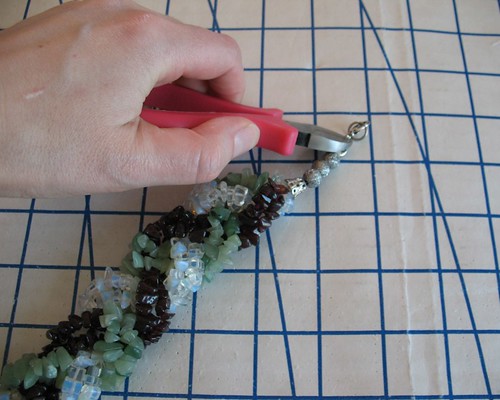
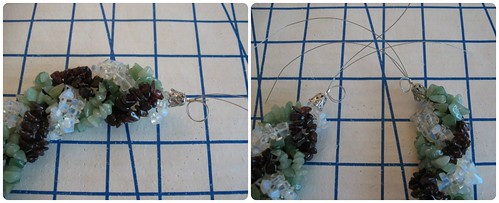
There was a distinct possibility that the whole thing was going to
come apart as soon as I used the wire cutter to remove the clasp. It looked like there were some crimp beads
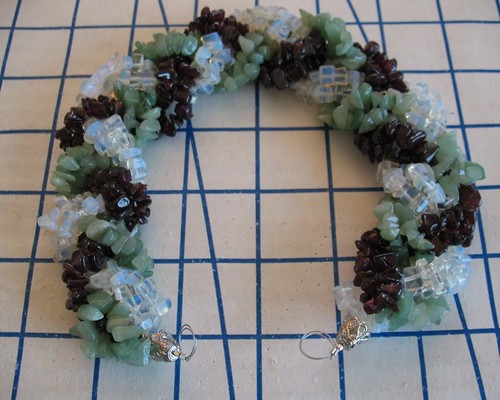
holding the torsade, and thankfully, they held everything in place!

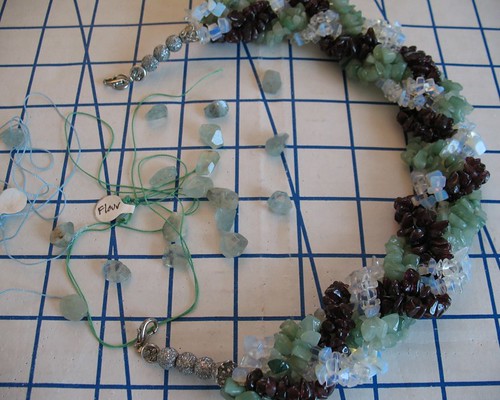
With only an inch left of the jewelry wire to work with, I
reattached the decorative cap, along with a new length of wire extending
through that cap.
My first thought was to use some fluorite beads to extend the length of the piece and add a toggle closure. But in the end, I was not happy with the way the beads I had on hand looked.
I decided ribbon was the best way to go – but, once again, had nothing that would work. Time to make some
ribbon!
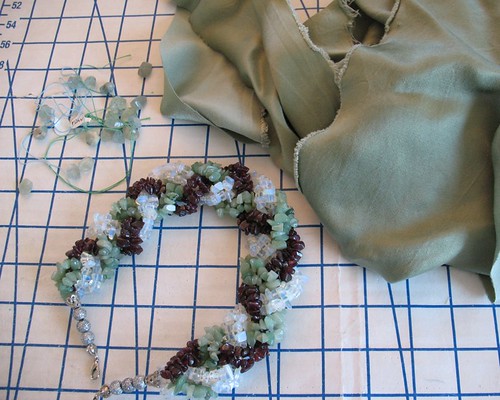
I am working on a dress from some lovely rayon satin, and
realized that the fabric would work beautifully with the necklace (the dress is
actually what reminded me of the necklace!).
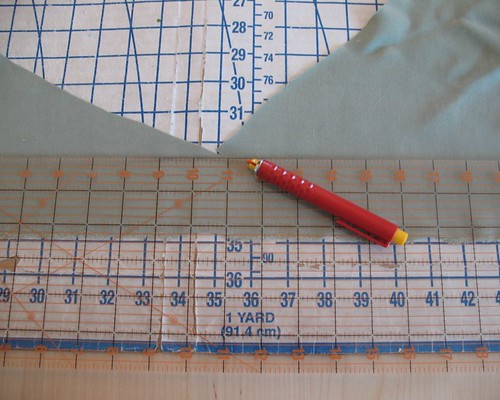
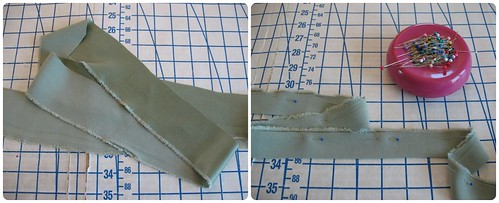
A width between ¾” and 1” seemed like a good size. The fabric was folded, stitched, and turned
right side out. After a good press with
the iron, my ribbon was ready.
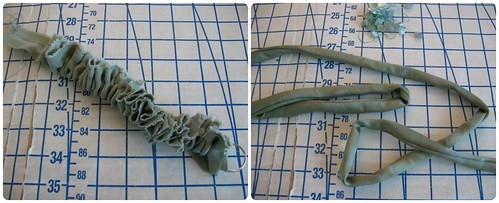
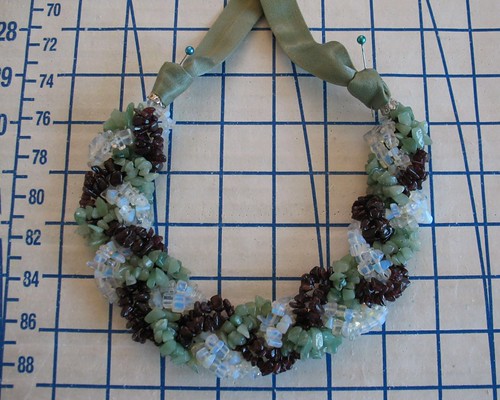
To test out length, I grabbed a couple of ribbons and tied
them to the end of the necklace. After
tying a bow, I placed a pin where I wanted the hanging ribbons to end. When the ribbons were untied I knew just
where to cut my handmade ribbon.

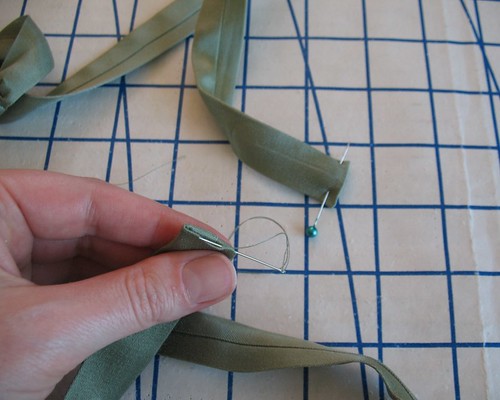
But now I had the problem of how to attach the ribbon. A jump ring was not the look that I
wanted. But a loop was the only thing I
could think of to attach a length of ribbon in a secure manner.
In the end, I looped my wire through a crimp bead.
Voila!
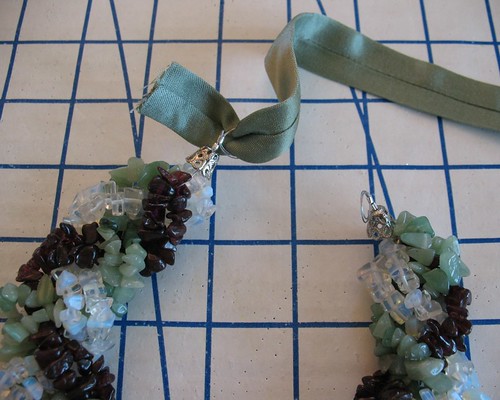
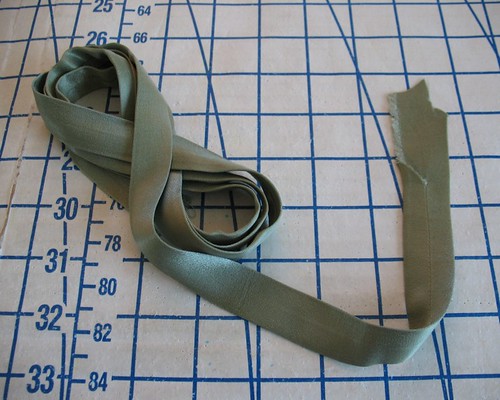
My cut satin ribbons were threaded through my newly create
wire loop, the raw edges tucked inside, and the ribbon wrapped around and
stitched over my created loop.
The last step was to finish the other end of my created
ribbon.

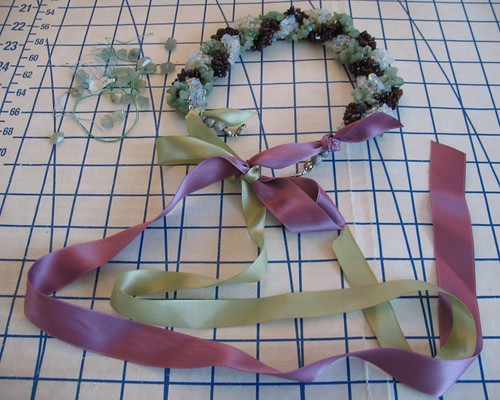
Now I have a necklace that I will wear and to top it off,
the length is adjustable depending on the neckline of whatever I choose to
wear!
Very inventive. And so pretty, too.
ReplyDeleteMonique
Great save--I'll have to try this with some of my annoying jewelry!
ReplyDeleteI love happy endings.
ReplyDeleteMe too!
DeleteBrava!
ReplyDeleteSplendidly lovely revamping! I've long adored making jewelry, so this post was extra special to me because (unlike with sewing, which I am not skilled at in the slightest), I felt it was something I could invision myself doing as well.
ReplyDelete♥ Jessica
Well done -- the necklace looks beautiful.
ReplyDelete