
It is probably obvious that I love my vintage patterns! I adore reproductions, too, which are
generally a little more forgiving because of the added markings and updated
instructions, free of rips and strange smells.
But there is something wonderful about working with a vintage
pattern that is sixty or seventy years old.
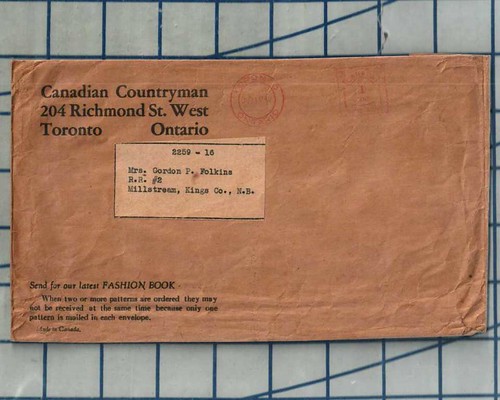
Some envelopes have written notes or postmarks, and many contain
newspaper clippings, or facing pieces cut out of newsprint. I love to imagine what the original purchaser
had in mind when she picked out her pattern!
If the idea of working with a vintage pattern intimidates
you, here are a few hints.
Pattern envelopes and instruction sheets are often in worse
shape than the actual pattern tissue, so don’t let the outside condition
dissuade you.
Check your sizes! If
you have been using a size 12 with contemporary Vogue patterns for as long as
you can remember, do not expect that a vintage size 12 will fit. Have you every heard the rumor that Marilyn
Monroe was a size 16? Well, in the 40s
and 50s, a size 16 had an upper bust measurement of 34” or 32”, depending on
the manufacturer.

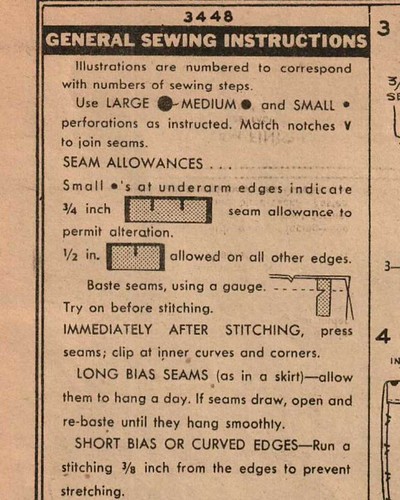
Another thing to watch out for is seam allowances. Do not assume that a standard 5/8” will be
included with your pattern tissue. I
have come across many ½” allowance, and even a 3/8” with one pattern. There is also a chance that side seams will have a larger
allowance given for fitting adjustments.
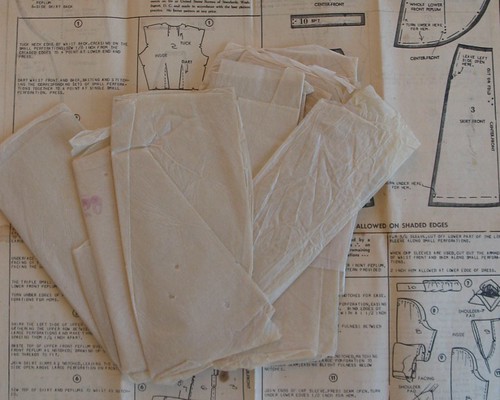
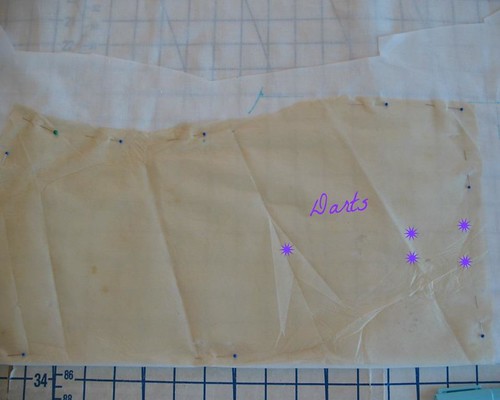
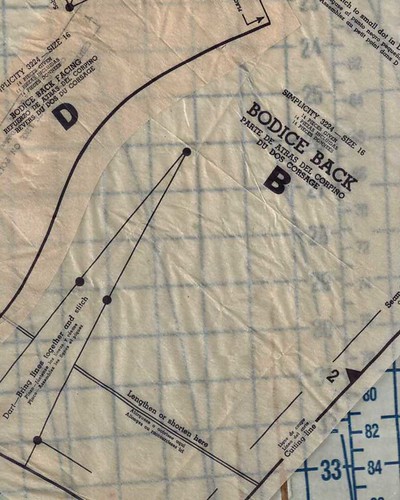
Many vintage patterns are not printed with the familiar
markings associated with contemporary patterns.
This means that you are working with a single sized pattern that has a
bunch of holes or perforations scattered throughout the piece. A quick peek at the instruction sheet will
verify what is what.
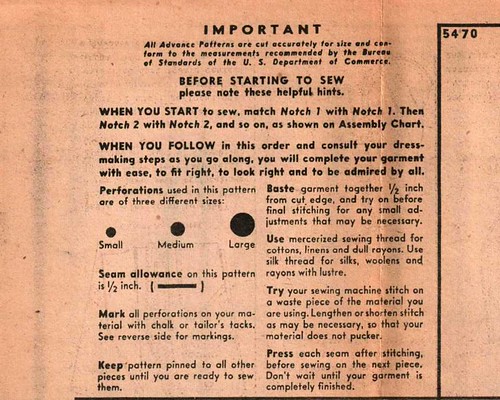
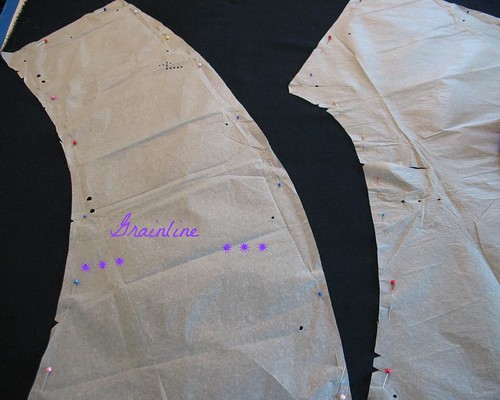
Grainline
perforations are generally larger in size, sometimes two or three right next to
each other.
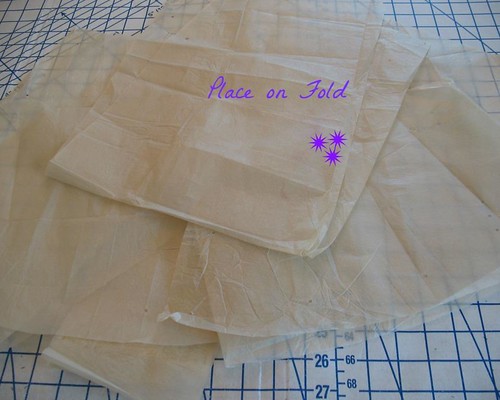
Pieces that are to be cut on
the fold are indicated by perforations as well, sometimes three in the shape of
a triangle.
Square perforations that line up with an opening edge mark
the placement of buttonholes. A sleeve can also have perforations to indicate where to cut
for a shorter version.
The perforations are also used to label each piece,
generally with numbers, which correspond back to the instruction sheet.

I believe perforations went out of style, at least in part, because they
become the weakest part of the pattern, and can tear easily (as do the
triangular cutouts at the edges). And
once multi-sized pattern became popular, they were finished. However, if you are a fan of the thread tack, they certainly
make things easier!

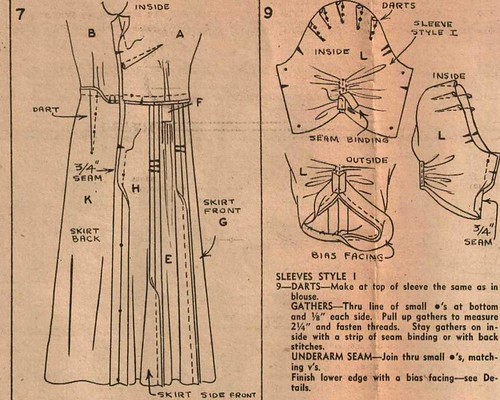
Instructions are generally a single sheet of paper, one side
with general information and cutting layouts; the other with instructions
specific to construction of the garment.
And do not expect step by step diagrams – most images will include
multiple steps that are numbered to indicate the order in which the pieces are
put together. But do not be discouraged - just plan on reading twice (or
thrice!) and stitching once.
If the idea of working with blank tissue paper does not
agree with you, there are plenty of vintage patterns that are printed.
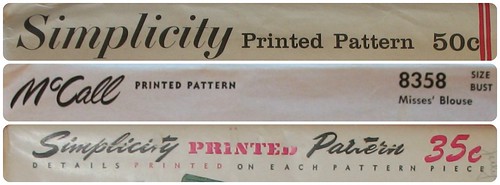
They are single sized, but look almost identical to contemporary patterns.
Vintage patterns assume a basic or perhaps intermediate
knowledge of garment construction. If
the purchaser of the pattern did not know much about sewing basics, certainly a
family member or friend would be able to help. Today we have the internet, full of tutorials and helpful
people a click away, so even if you cannot find a local sewing class, you can
find answers to your questions!
Some terminology has changed. For instance, “slide fastener” refers to the
humble zipper, and “press studs” are snaps.
Many vintage side closures use those press studs in place of the now
standard zipper. Of course, substituting
one for the other is easy enough!
Facings are often left off entirely, and neck and armhole
edges are to be finished with bias pieces of fabric for which no pattern piece
is given.
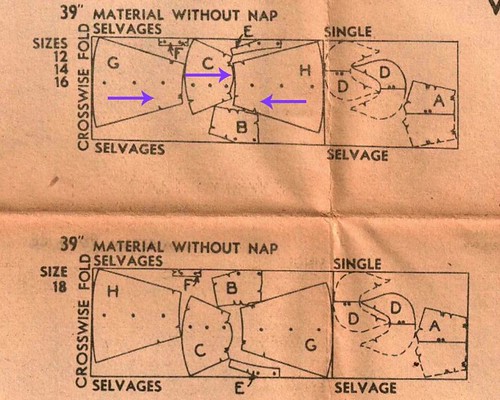
Pattern envelopes will include yardage requirements, but
fabric layouts are generally multi-directional. I prefer to cut all of my pieces in the same
direction, which uses a bit more yardage.
One thing I have learned from working with old patterns is
that cellophane tape and pins are the enemy.
Pins rust and create tears in pattern pieces and envelopes. And cellophane tape becomes a sticky mess
that transfers from one tissue piece to another, sometimes making it impossible to separate the pieces. Cellophane tape is and always will be
banished from my sewing room!
My personal bias aside, there is a wonderful assortment of
vintage pattern goodies to be found. Even
if you do not want to look “vintage,” so many of the designs are timeless. I hope you take a chance on some old gems and
rescue them from the trash bin!
[The fabric for this project was received in exchange for my
contributions as a Britex Guest Blogger.]
What a great article! Everything you post is so inspirational! Another reason the perforated patterns went out of style is that they punched a whole bunch of sheets at the same time in a giant hole punching machine and the bottom ones would sometimes come out a little off.
ReplyDeleteSo interesting that your perforated pattern has numbers. All the ones I've ever worked with were labeled with letters. Must be a regional thing.
Thanks Laura Mae, this was very helpful! It is interesting seeing the evolution of patterns over the years.
ReplyDeleteI have yet to work with an unprinted pattern, but I know I will get around to it one day! So this is wonderful to have in my back pocket when I do! Thank you!!
ReplyDeletexoxo
-Janey
I have a few patterns from the 1920's and it is hard to wrap my head around just how old they are and, as you said, what the original buyer had planned for them!
ReplyDeleteGreat post - thanks! I remember the perforated letters denoting the pattern pieces on the patterns that my mother used!
In 30 years of sewing I had never used an unprinted pattern, having used either contemporary patterns or drafted my own. Weirdly I thought drafting was less scary than an unprinted pattern! However, after acquiring a HUGE collection from my mother and deciding that a particular frock was just too nice not to do, I embarked. After having a little internal debate to whether tracing was a waste of time or not, I traced and found it to be the sensible option. Very easy to transfer markings with the perforations and useful for making construction notes on the new pattern. And tracing will also preserve the original pattern perhaps for my daughter.
ReplyDeleteSo all the sewists on the interwebs were right when they say "don't let unprinted patterns scare you" :)
Here in Australia, a press stud is still a press stud. Thanks for a trip down memory lane. I remember my mothers patterns, but they are now all gone.
ReplyDelete